Tried it: Little Things to Sew Messenger Bag

photo 1

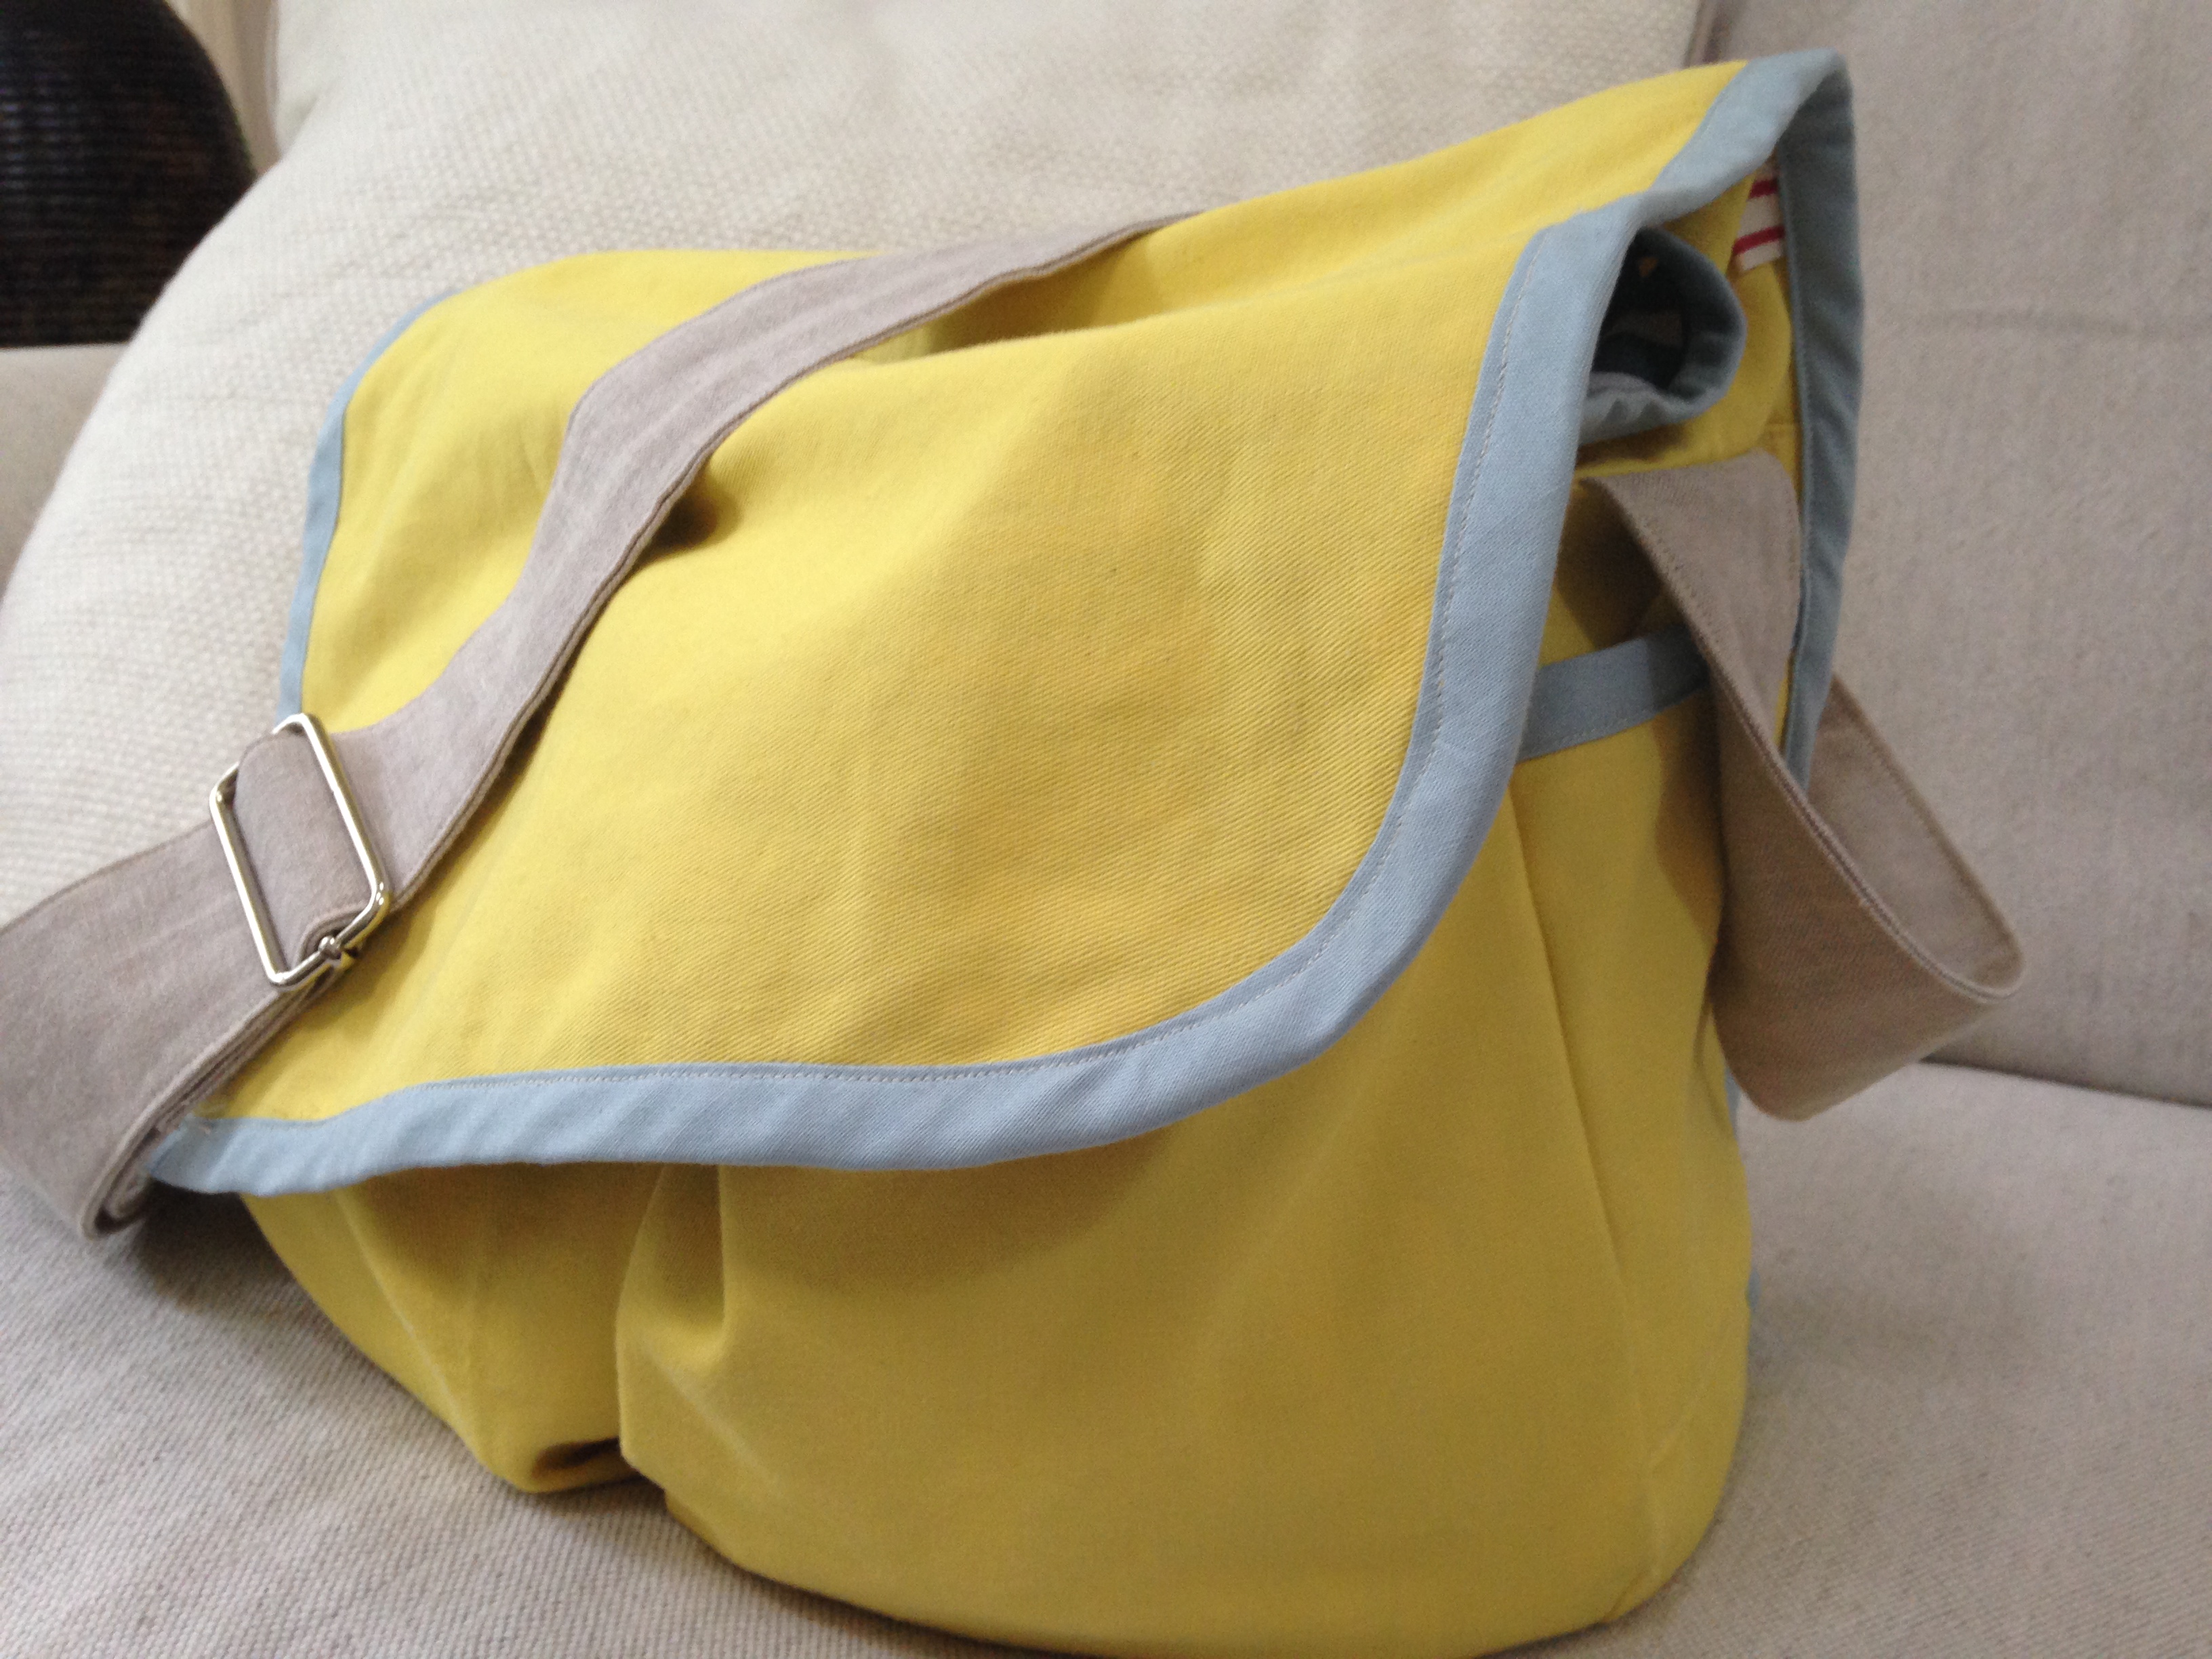
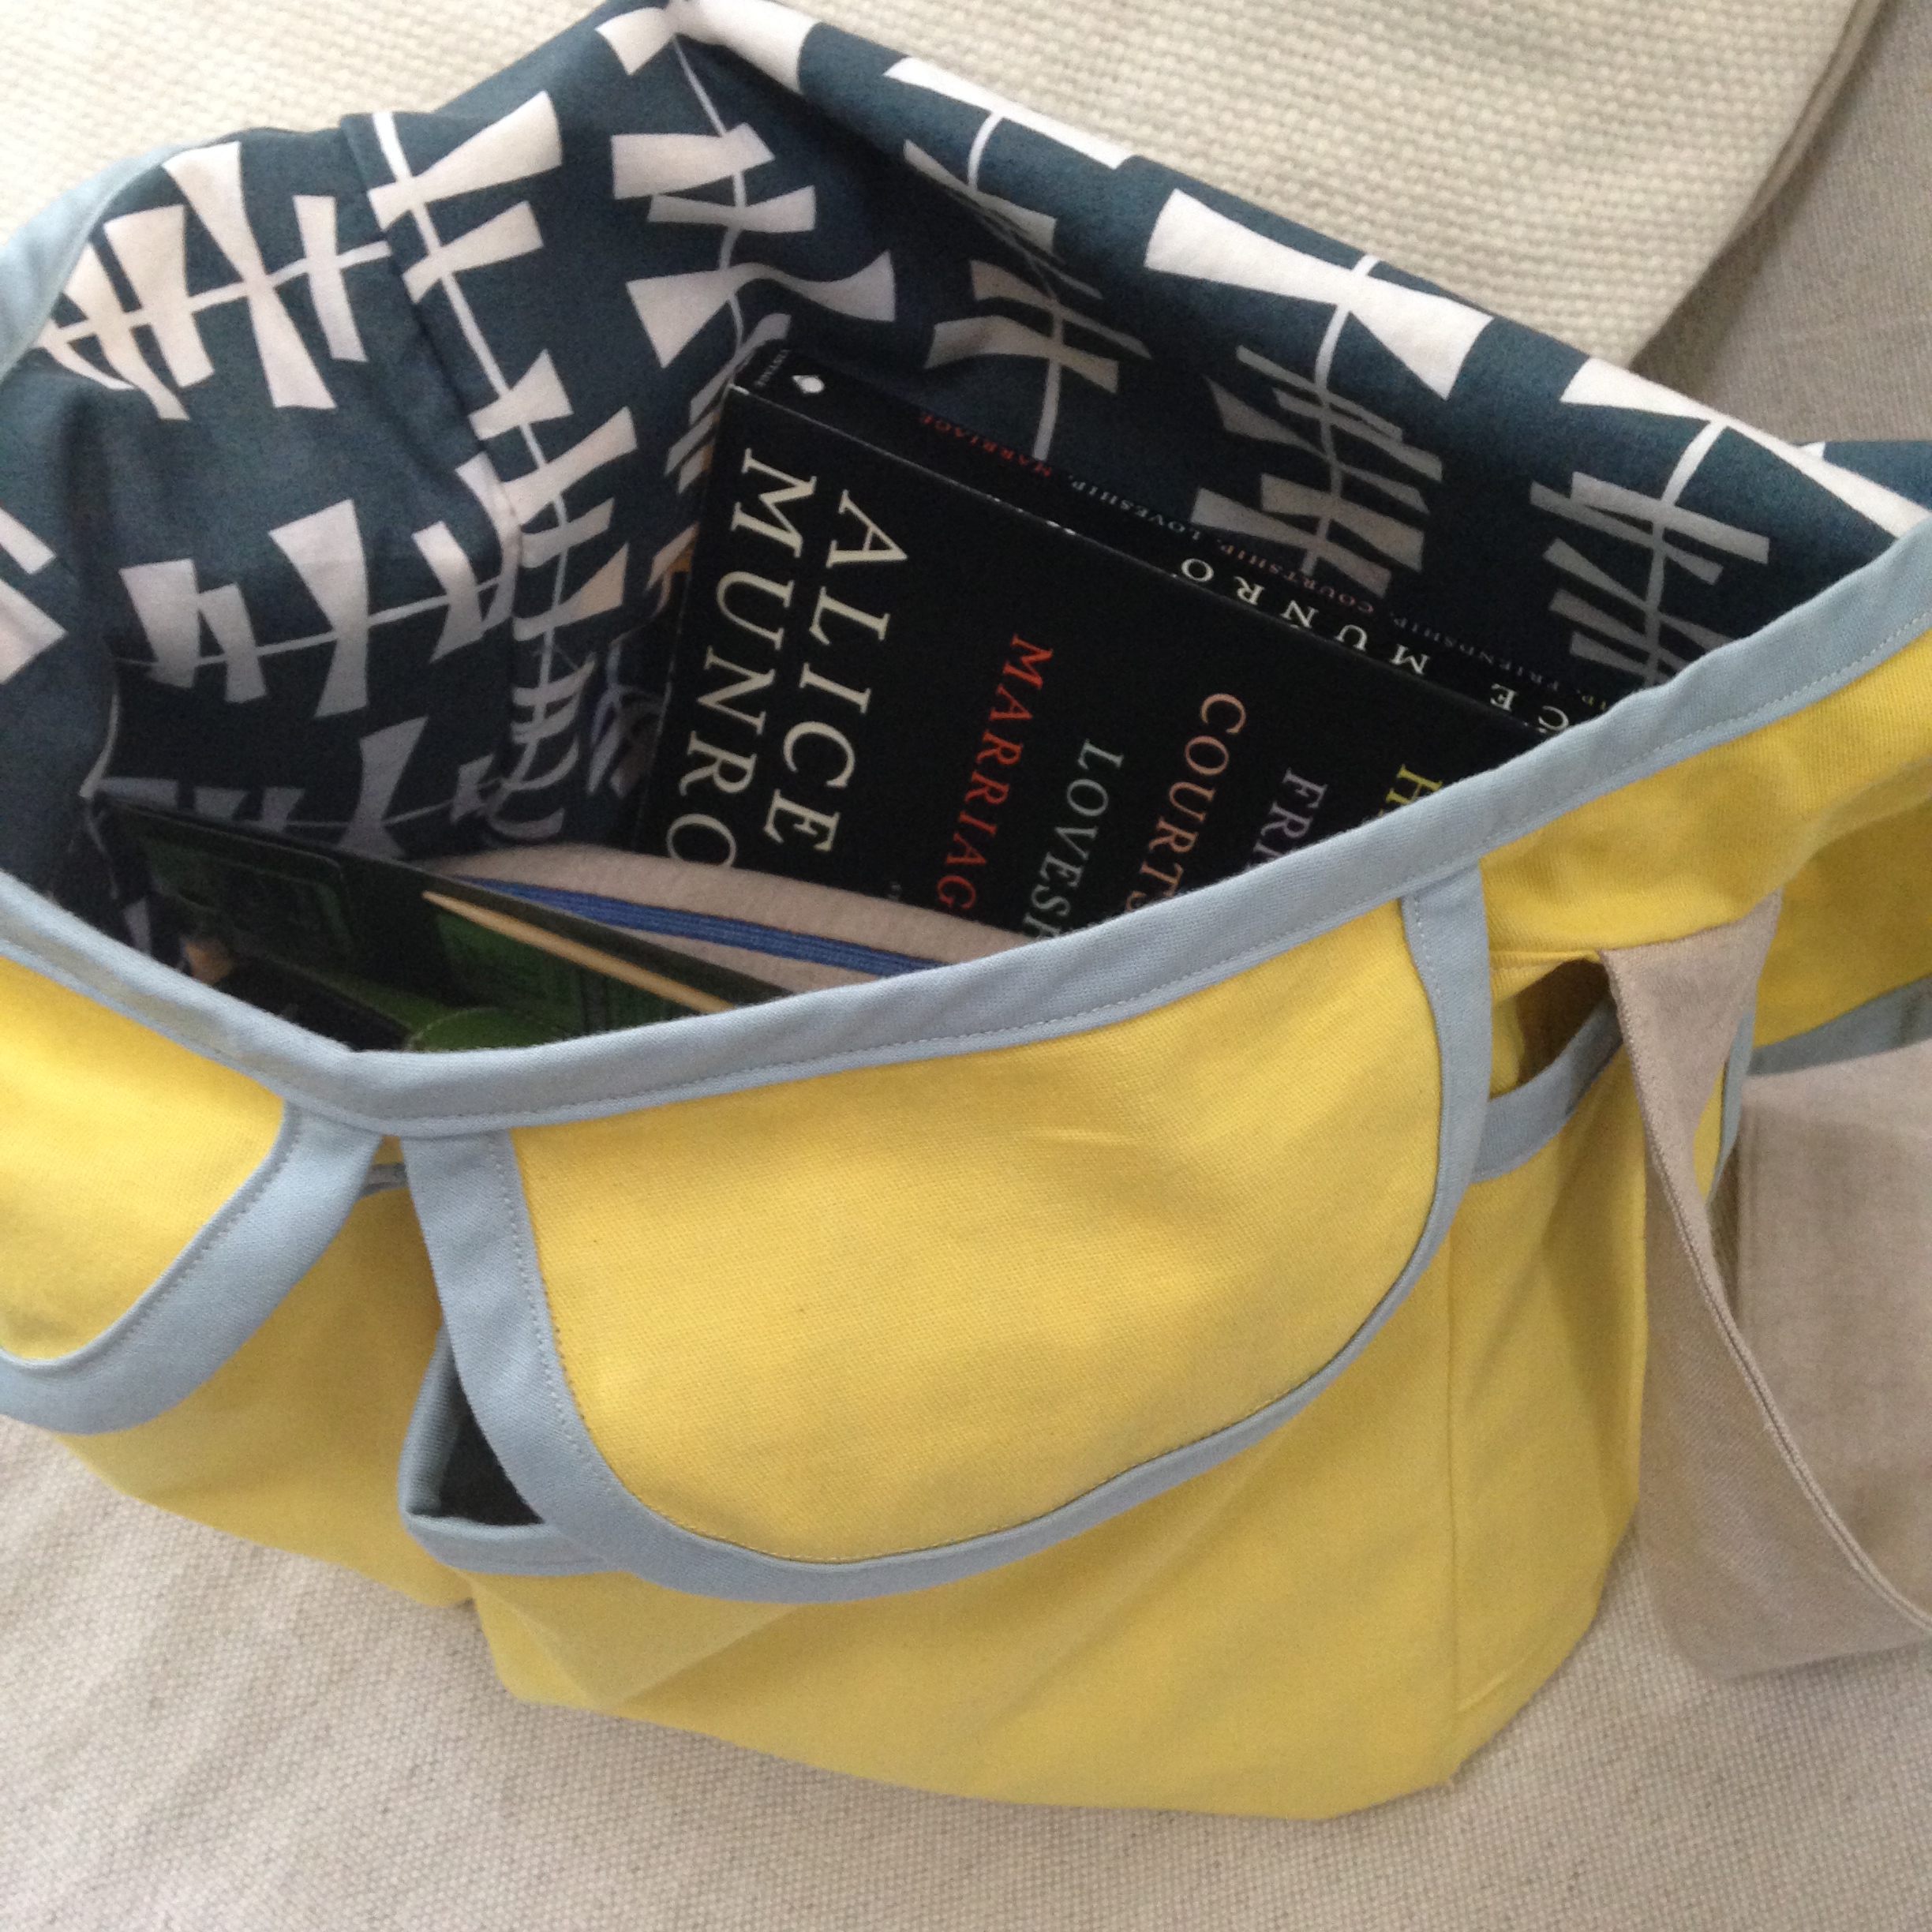
I am huge fan of Liesl Gibson, creator of the Oliver and S and Liesette pattern lines. Not only does she have impeccable taste, she writes patterns that make seemingly difficult projects simple and fun. So, when her book Little Things to Sew was published two years ago it went to the top of my list–even though my little person was too old for most of the projects. It is just too cute not be in my craft library. I made family of bucket hats last year and this year I tackled the messenger bag, which comes in kid and adult sizes. I made the adult size using a fun yellow canvas, a print from Lotta Jansdotter’s Glimma collection for the lining, Essex Yarn Dyed Linen in Flax for the strap, and Kona Fog for the binding.

The hardest part was finding the hardware for straps. I finally found just what I needed at Rebel Surplus on Etsy–hoorah! Liesl’s instructions are just perfect. I particularly love that she really explains how to execute each step successfully. Instead of saying “sew on bias binding,” she includes a little tutorial in the back of the book that explains how to align the binding so you catch both sides. Ah ha! This bag uses a lot of bias binding, so you will be a total pro when you are finished with your project.

If I had worked on the bag from start to finish, I think it would have taken about three or four hours. Even though it has lots of pockets, is lined, and looks very professional, if you go step by step, I think anyone with a modicum of sewing experience could complete this project.

photo 3

I think if I were to make another bag (which I might!) I would use a heavier weight canvas for the outside or some interfacing to give the bag a little more structure. Either way, I love my bag!

7 Summer Crafts to Make with Kids

These 7 crafts should at least fill the first week of summer vacation with the kids. After that, who knows?

1. God’s Eye from the Free People blog

2. Breezy Friendship Bracelets from Molly’s Sketchbook at Purlbee

3. Popsicle Tote from youaremyfave

4. Tie-Dye T-shirts from Martha Stewart

5. Lemonade Stand from Oh Happy Day!

6. Cork boat by Inner Child Fun

7. Wooden Necklaces by Avery Rayne Designs

Collections!

Marbles, buttons, super balls, rotary phones–I seem compelled to collect the bits and pieces of life.  Beachcomber, gutter forager, accumulator! I aspire to minimalism, but miss it by a long shot. Here is a glimpse into the galleries of my personal museum. What do you collect? And how do you display (or not) your treasures?

DIY: How to Make Mini Paper Boxes

homemade city mini paper boxes

These 1″ little boxes won’t solve your storage problems (unless you just don’t where to put that penny, or marble, or piece of lint) but like many miniature things, they are delightful. Once during a bout of unemployment, I folded zillions of these (which may say something about my non-transferable work skills and resulting joblessness). Watch out, they’re fun. Make one, make many: they proliferate under your fingertips.

Materials

3″ square origami paper

bone folder, or a pen with a rounded cap to make creases

IMG_2853

Step 1: Lay one sheet of origami paper, wrong side up, on your working surface. Fold the paper in half, long edge to long edge. (You can gently press with your fingers first, and then use your bone folder to make a sharper crease.) Open the paper and rotate 90 degrees. Fold in half again, long edge to long edge. Again, open the paper.

IMG_2869

Step 2: Fold one corner to its opposite, to make a triangle. Open the paper, and fold the other corner to its opposite. Unfold. Your paper will look like this:

IMG_2873

Step 3: Fold each corner to the center point. (Fold four times.)

IMG_2874

Step 4: Fold the bottom edge of your square up to the center. Fold the top edge of your square down to meet the center. Unfold. Rotate 90 degrees, and repeat, folding the remaining two edges of the square to the center.

IMG_2876

Step 5: Open two of the corners opposite each other. Lift the two sides of the box. Focussing on one corner at at time, press in the “tabs” you created with creases. As you do this, you will be lifting the third side of the box. Then press down the corner over the edge of side. The corner point should meet the other two points. Repeat to make the fourth side of the box. You’ve made the bottom half of the box.

IMG_2878IMG_2880

Step 6: To make the lid, you will do the same thing, but with one alteration. In Step 4, instead of folding the edge of the square to the center, you will instead fold it almost but not quite to the center. Leave about a millimeter of distance from the center. Do this again to the top edge. Open, and repeat with the remaining two square edges. This will make the lip of the lid shorter and increase the diameter of the lid, so that the lid fits over the bottom of the box you created.

IMG_2884IMG_2886

Enjoy!

Quilts and Color Exhibit at Boston MFA


Boston MFA Quilts and Color

Carpenter’s Wheel Quilt, attributed to Mrs. Miller, Mennonite, Easton, Pennsylvania, about 1890

The quilts displayed at the Quilts and Color: The Pilgrim/Roy Collection now at the Boston MFA are not for those who prefer a palette muted and restrained. While my kids were wolfing Fenway franks at the ballgame this past weekend (Go Sox!), my mom and I snuck off to to take a peek. These are not your grandmother’s quilts–or are they? In room after room, we encountered vibrating, dizzying color in bold patterns that are amazingly modern considering that their mostly Mennonite and Amish makers lived in the 19th and early 20th century.

Sunburst Quilt

Sunburst Quilt, Mrs. Ephraim Scott, American, 1856

Trained as artists, Gerald Roy and Paul Pilgrim collected quilts reminiscent of modern abstract art. They noted that the quilters displayed an intrinsic color sense, experimenting with saturated hues and color effects. In each room of the exhibit are paintings by Abstract Expressionists and Op Artists, highlighting the affinity between the quilts and the twentieth-century art.

An exquisite painting by color theorist Josef Albers at the Quilts and Color Exhibit

An exquisite painting by color theorist Josef Albers at the Quilts and Color Exhibit


The exhibit runs through July 27, 2014.