These 1″ little boxes won’t solve your storage problems (unless you just don’t where to put that penny, or marble, or piece of lint) but like many miniature things, they are delightful. Once during a bout of unemployment, I folded zillions of these (which may say something about my non-transferable work skills and resulting joblessness). Watch out, they’re fun. Make one, make many: they proliferate under your fingertips.
Materials
3″ square origami paper
bone folder, or a pen with a rounded cap to make creases
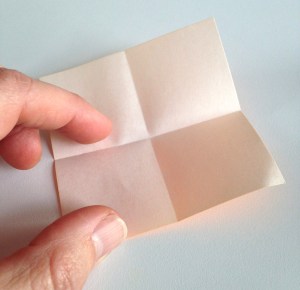
Step 1: Lay one sheet of origami paper, wrong side up, on your working surface. Fold the paper in half, long edge to long edge. (You can gently press with your fingers first, and then use your bone folder to make a sharper crease.) Open the paper and rotate 90 degrees. Fold in half again, long edge to long edge. Again, open the paper.
Step 2: Fold one corner to its opposite, to make a triangle. Open the paper, and fold the other corner to its opposite. Unfold. Your paper will look like this:
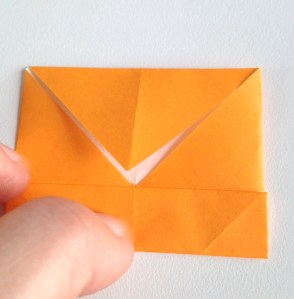
Step 3: Fold each corner to the center point. (Fold four times.)
Step 4: Fold the bottom edge of your square up to the center. Fold the top edge of your square down to meet the center. Unfold. Rotate 90 degrees, and repeat, folding the remaining two edges of the square to the center.
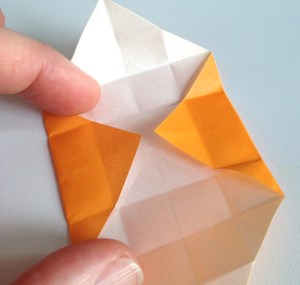
Step 5: Open two of the corners opposite each other. Lift the two sides of the box. Focussing on one corner at at time, press in the “tabs” you created with creases. As you do this, you will be lifting the third side of the box. Then press down the corner over the edge of side. The corner point should meet the other two points. Repeat to make the fourth side of the box. You’ve made the bottom half of the box.
Step 6: To make the lid, you will do the same thing, but with one alteration. In Step 4, instead of folding the edge of the square to the center, you will instead fold it almost but not quite to the center. Leave about a millimeter of distance from the center. Do this again to the top edge. Open, and repeat with the remaining two square edges. This will make the lip of the lid shorter and increase the diameter of the lid, so that the lid fits over the bottom of the box you created.
Enjoy!


What are you going to do with all these lovelies? Such mini perfection and fab colors, too! I am going to find an article I read a while ago about a woman who makes incredibly complicated origami boxes and send it to you…
I’m not entirely sure what I’m going to do with them. My cat really likes to bat them around. Do send the article–maybe learning complicated origami will ward off dementia (or bring it on?).