Penny & Jelly and a Star-Powered Craft!

Your friend is not invited to the sleepover. But you are. What do you do?

In Penny & Jelly Slumber Under the Stars, Penny faces this dilemma, with a twist or two. The excluded friend isn’t just an ordinary pal but her fur-faced, dog-breathed bestie, Jelly. And the sleepover isn’t the any-old variety, either. It’s a special sleep-under-the-stars event at the Town Community Center.

Penny and Jelly Slumber Under the Stars

Penny meets this problem with aplomb. As a maker and dabbler myself, I love how Penny sets about finding a solution. The girl gets crafty!

Armed with yarn, cotton balls, recyclables, shaving cream, even gelatin, Penny attempts to create a substitute Jelly to attend the sleepover instead.

Penny & Jelly Slumber Under the Stars

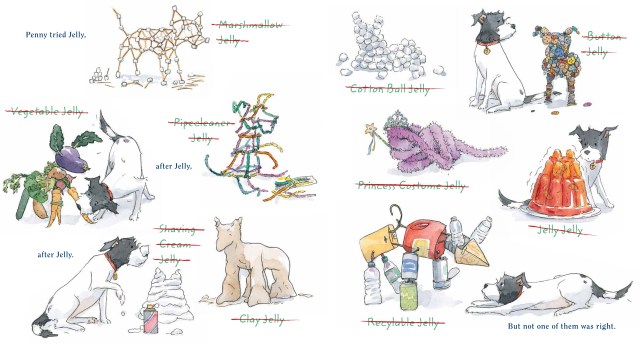
(A close-up of the classic toothpick-and-marshmallow combo:)

Marshmallow Jelly

OK, as you’ve probably guessed, Penny learns that craft projects don’t fix all of life’s problems. (She does find a creative solution. But I’m not giving it away.)

Nonetheless, the story inspired me to get crafty. Why not throw a starry sleepover for a couple of wacky, resourceful kids that I know and celebrate the publication of the second Penny & Jelly adventure (written by Maria Gianferrari and illustrated in warm washes by Thyra Heder)?

IMG_7724

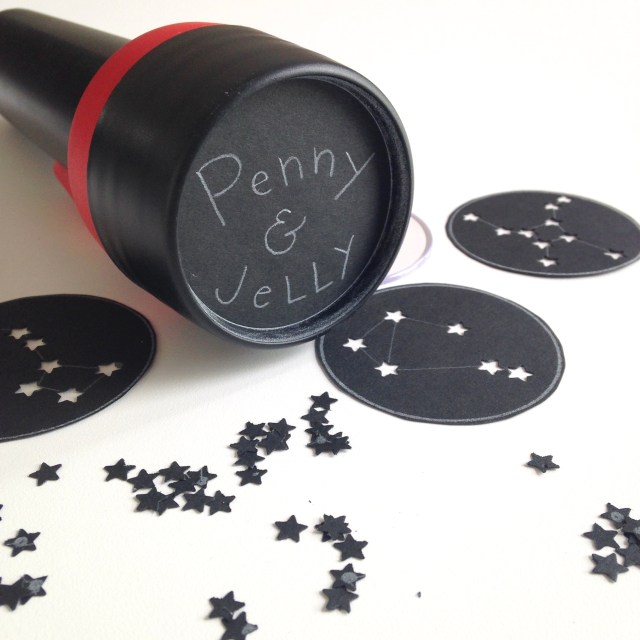
We don’t see a lot of stars in the city so we chose to make our own. Here’s how:

You will need a standard size flashlight, 1/4″ hole punch (we used a star-shaped punch), black construction paper, scissors, white pencil, and masking tape.

Step 1: On the black paper, trace circles that will cover the lens of the flashlight.

IMG_7640

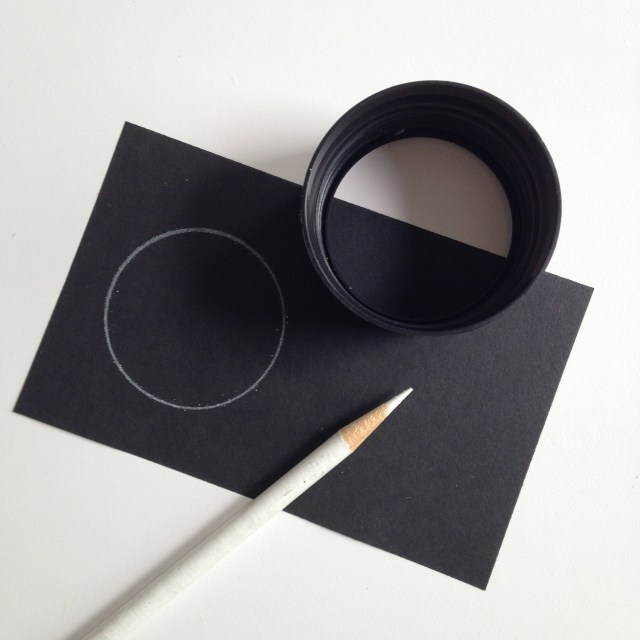
Step 2: Sketch your starry designs. Simple constellation patterns are readily available online for inspiration–or for tracing.

IMG_7713

Step 3: Cut out your circles and punch holes for each star in your pattern.

IMG_7719

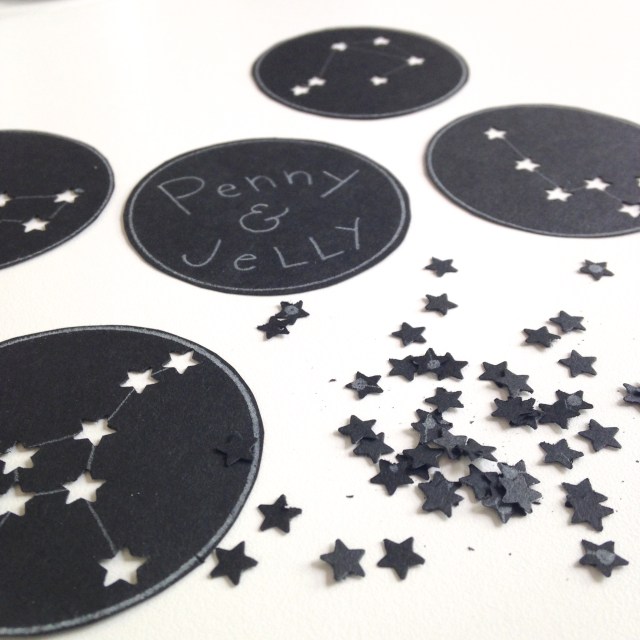
Step 4: You can either inset your star discs (which involves unscrewing the head of the flashlight, removing several parts, and then replacing everything–whew! involved)–or you can overlay the star disc on the lens. You may need to use masking tape to keep it in place while projecting.

IMG_7650

Step 5: Pop some corn, set up the sleeping bags, and project the starry night onto your ceiling!

IMG_7711

Boston-area residents: Bring your young book enthusiasts to the Penny & Jelly Slumber Under the Stars Book Launch at Newtonville Books on July 24 at 2 p.m.

And check out all of these stops on the the official Penny & Jelly blog tour:

Extra feature:


Make: School Pencil Flags

This one’s for people who share my unnatural possessiveness toward pencils. In my school library, pencils walk away with alarming frequency. A yellow #2 looks a lot like every other one, after all.

My solution: pencil flags! The kids love getting picky-choosy about their favorite flags, but they also tend to return them more often. I glued little sayings and stickers on colored rectangles of paper and used strong packing tape to attach to the pencils. Now my library pencil jar is full!


Make: Tissue Paper Collage Creature Feature


When Danielle Davis of This Picture Book Life blog asked if I’d make a craft inspired by the delightful picture book Normal Norman by Tara Lazar, illustrated by S. Britt, I thought, no problem! After all, Norman is my kind of guy. A dune-buggy-driving, jet-pack-flying, tiara-toting, out-of-the-box orangutan dude.

Norman’s multi-hued self is decidedly not orangutan normal, but it is fun-loving, just like the big guy. And tissue paper collage seemed the best way to capture Norman’s coat of many colors. Tissue paper collage is also great because it’s very forgiving in less experienced kid hands–you can smudge, rip, and layer exuberantly, and still the results are delicious.

What you need:

Tissue paper in fun colors

Mod Podge

paint brush

white card stock

stick-on googly eyes

paper fasteners

popsicle sticks

Trim the tissue paper into 1″ squares. (We sorted our tissue squares for easy use: purples, blues, and greens in one bowl, yellows and oranges in another.)

Next trace Norman’s orangutan bulk, his adorable eggplant-shape head, and his 2 longish arms onto card stock. (If that step seems onerous, we traced some basic gorilla shapes for you here.)

Brush a layer of Mod Podge onto a small area of your shape and cover with tissue squares. Make sure to overlap squares to create new hues. Seal the squares by brushing another layer of Mod Podge over the top of them. Continue in small areas until you’ve covered the shape.

IMG_7032

Give your collage time to dry. Once dried, cut along the outlines of each shape. Adhere the face with glue or Mod Podge and attach the arms with paper fasteners (to give them a little gorilla swing).

Now for the best part: accessorize!

Add goggly eyes, brown specs, a teeny tiara and tutu, or even a dual-rocket jet pack (Norman’s preferred not-normal way to get around). Attach a popsicle stick to the back of your creation to make a puppet. Do not forget to make some friends for Norman: a magenta clarinet-playing hippo, a rollerskating giraffe, a top-hatted snake!


Make: Paper Hearts

IMG_6964

Heart Day is almost here. What to make? For me, this holiday is not about red roses but paper and scissors. (And maybe a bit of chocolate, too.) I like trading valentines that remind me of my school days: home-hewn, simple, with lots of pink and red.

Paper hearts fill my criteria for simple: the folds are easy enough for kids’ hands and the results are colorful, with the delicious gloss and saturation of origami paper. I used 3 x 3″ origami paper (which makes 2″ hearts) but larger paper would work well, too.

This slideshow requires JavaScript.


Make: Little Things

I spent the rainy weekend making miniatures. I have made a tiny chest of drawers before (although never with leftover torrone boxes), but the wee gum ball machine was a moment of pure Lilliputian inspiration.

I’m planning to bring my creations to school and install them in the shoebox house that the students have been building in our library makerspace. Fingers crossed that they will flip out.

If you are so inclined to make your own mini gum ball machine, you need one of those plastic bubbles (which, yes, come from gum ball machines); colorful teeny beads, and some sort of spool. I think you can intuit the rest but make sure to arm yourself with a hot glue gun.

Happy 2016, folks~