Make: Little Ghastly Peg People


Boo. These miniature spookies aren’t going to scare anyone, but they were fun to paint and a good workout for my fine motor skills/eyesight.

Little ghastlies by homemadecity.com

I bought the unfinished peg dolls at my local craft store and used acrylic paint plus a coat of high gloss Mod Podge to cover.

Here is a list of some of my online inspirations:

Abby Jacobs’s peg vampire on etsy

This monster mash on Craftster

Pegged etsy shop–Halloween and Day of the Dead peg dolls (plus very sweet pilgrim peg dolls)

Happy Halloween, everyone!

DIY: Easy color block coasters – free pattern!

IMG_2826

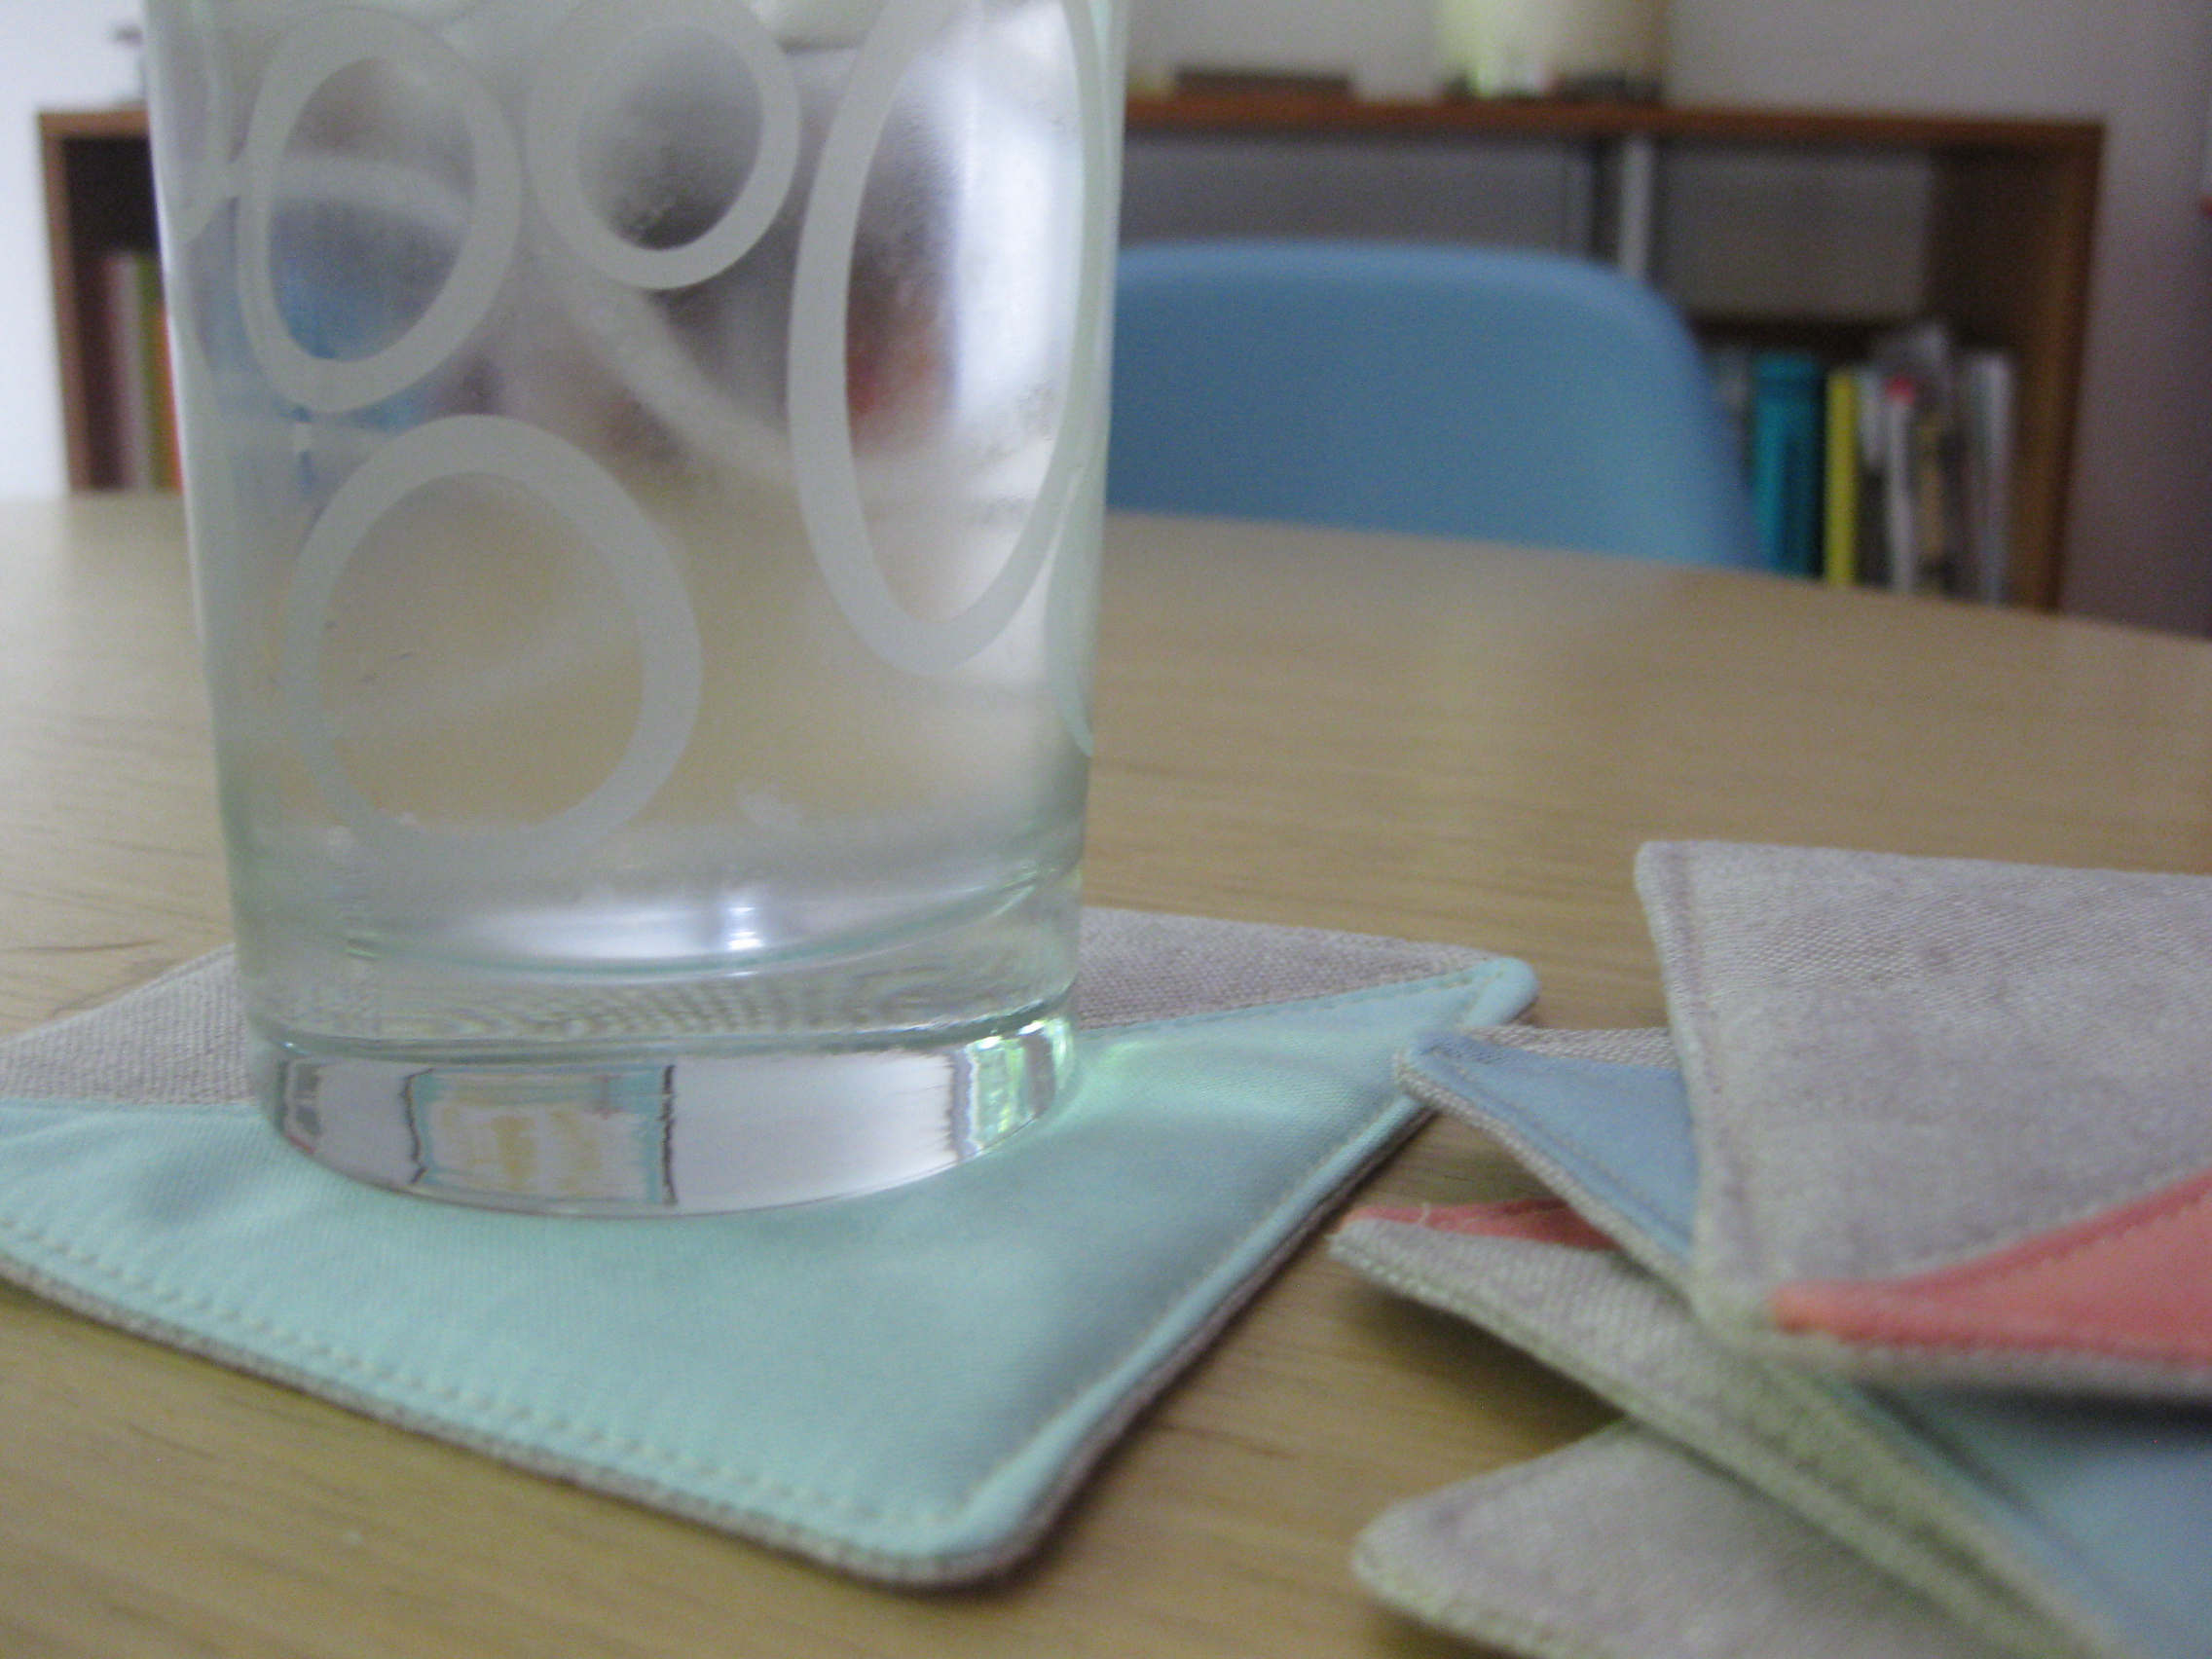
Just in time for ice cold drinks, these nifty linen and cotton coasters are ready to get to work catching drips (and adding some springtime color to your table.) Better yet, a set of these would make a lovely Mother’s Day gift. You can make a set of six in about an hour and your materials will cost $10 at most (or nothing if you are a hoarder of scraps like me).

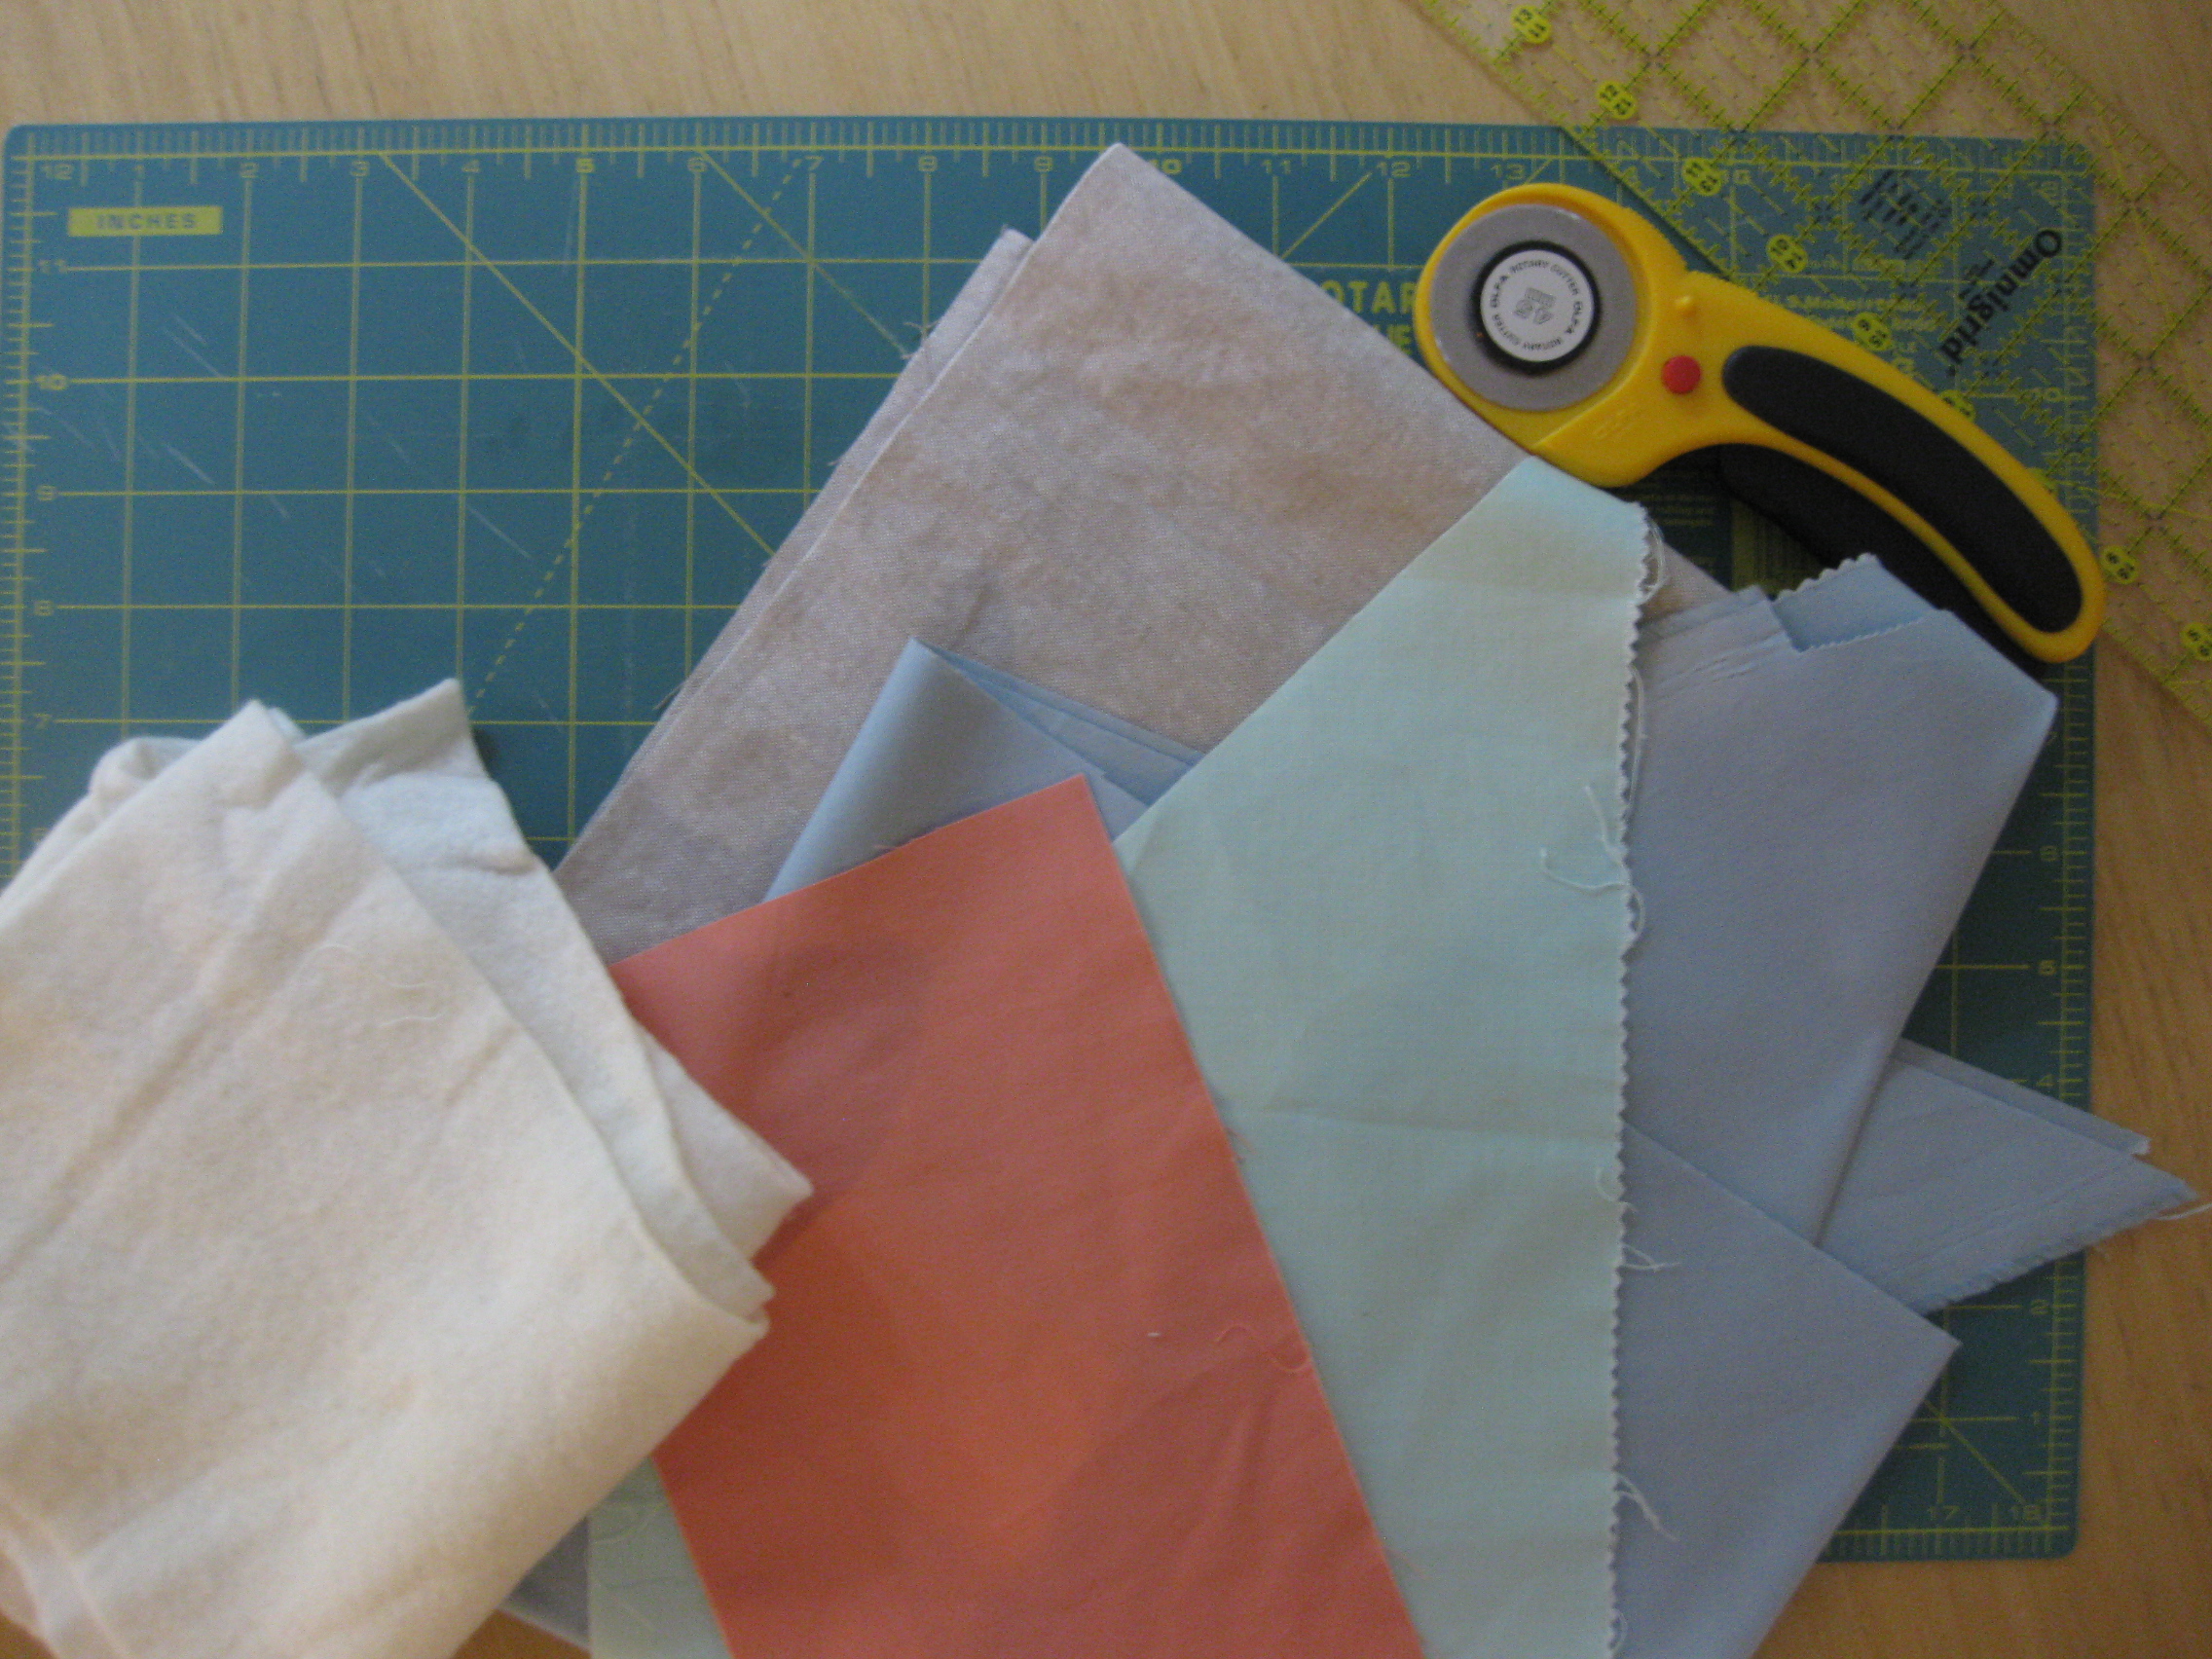
Materials to make six 4″ x 4″ coasters

IMG_2814

Approximately 1/4 yard linen (I prefer Essex yarn dyed — the color shown above is flax)

Three 5″ squares of solid quilting cotton. (I used three colors of Robert Kaufman Kona cotton: Salmon, Aqua, and Fog.)

Piece of cotton batting (approximately 10″ x 15″)

Cotton thread

Five Easy Steps

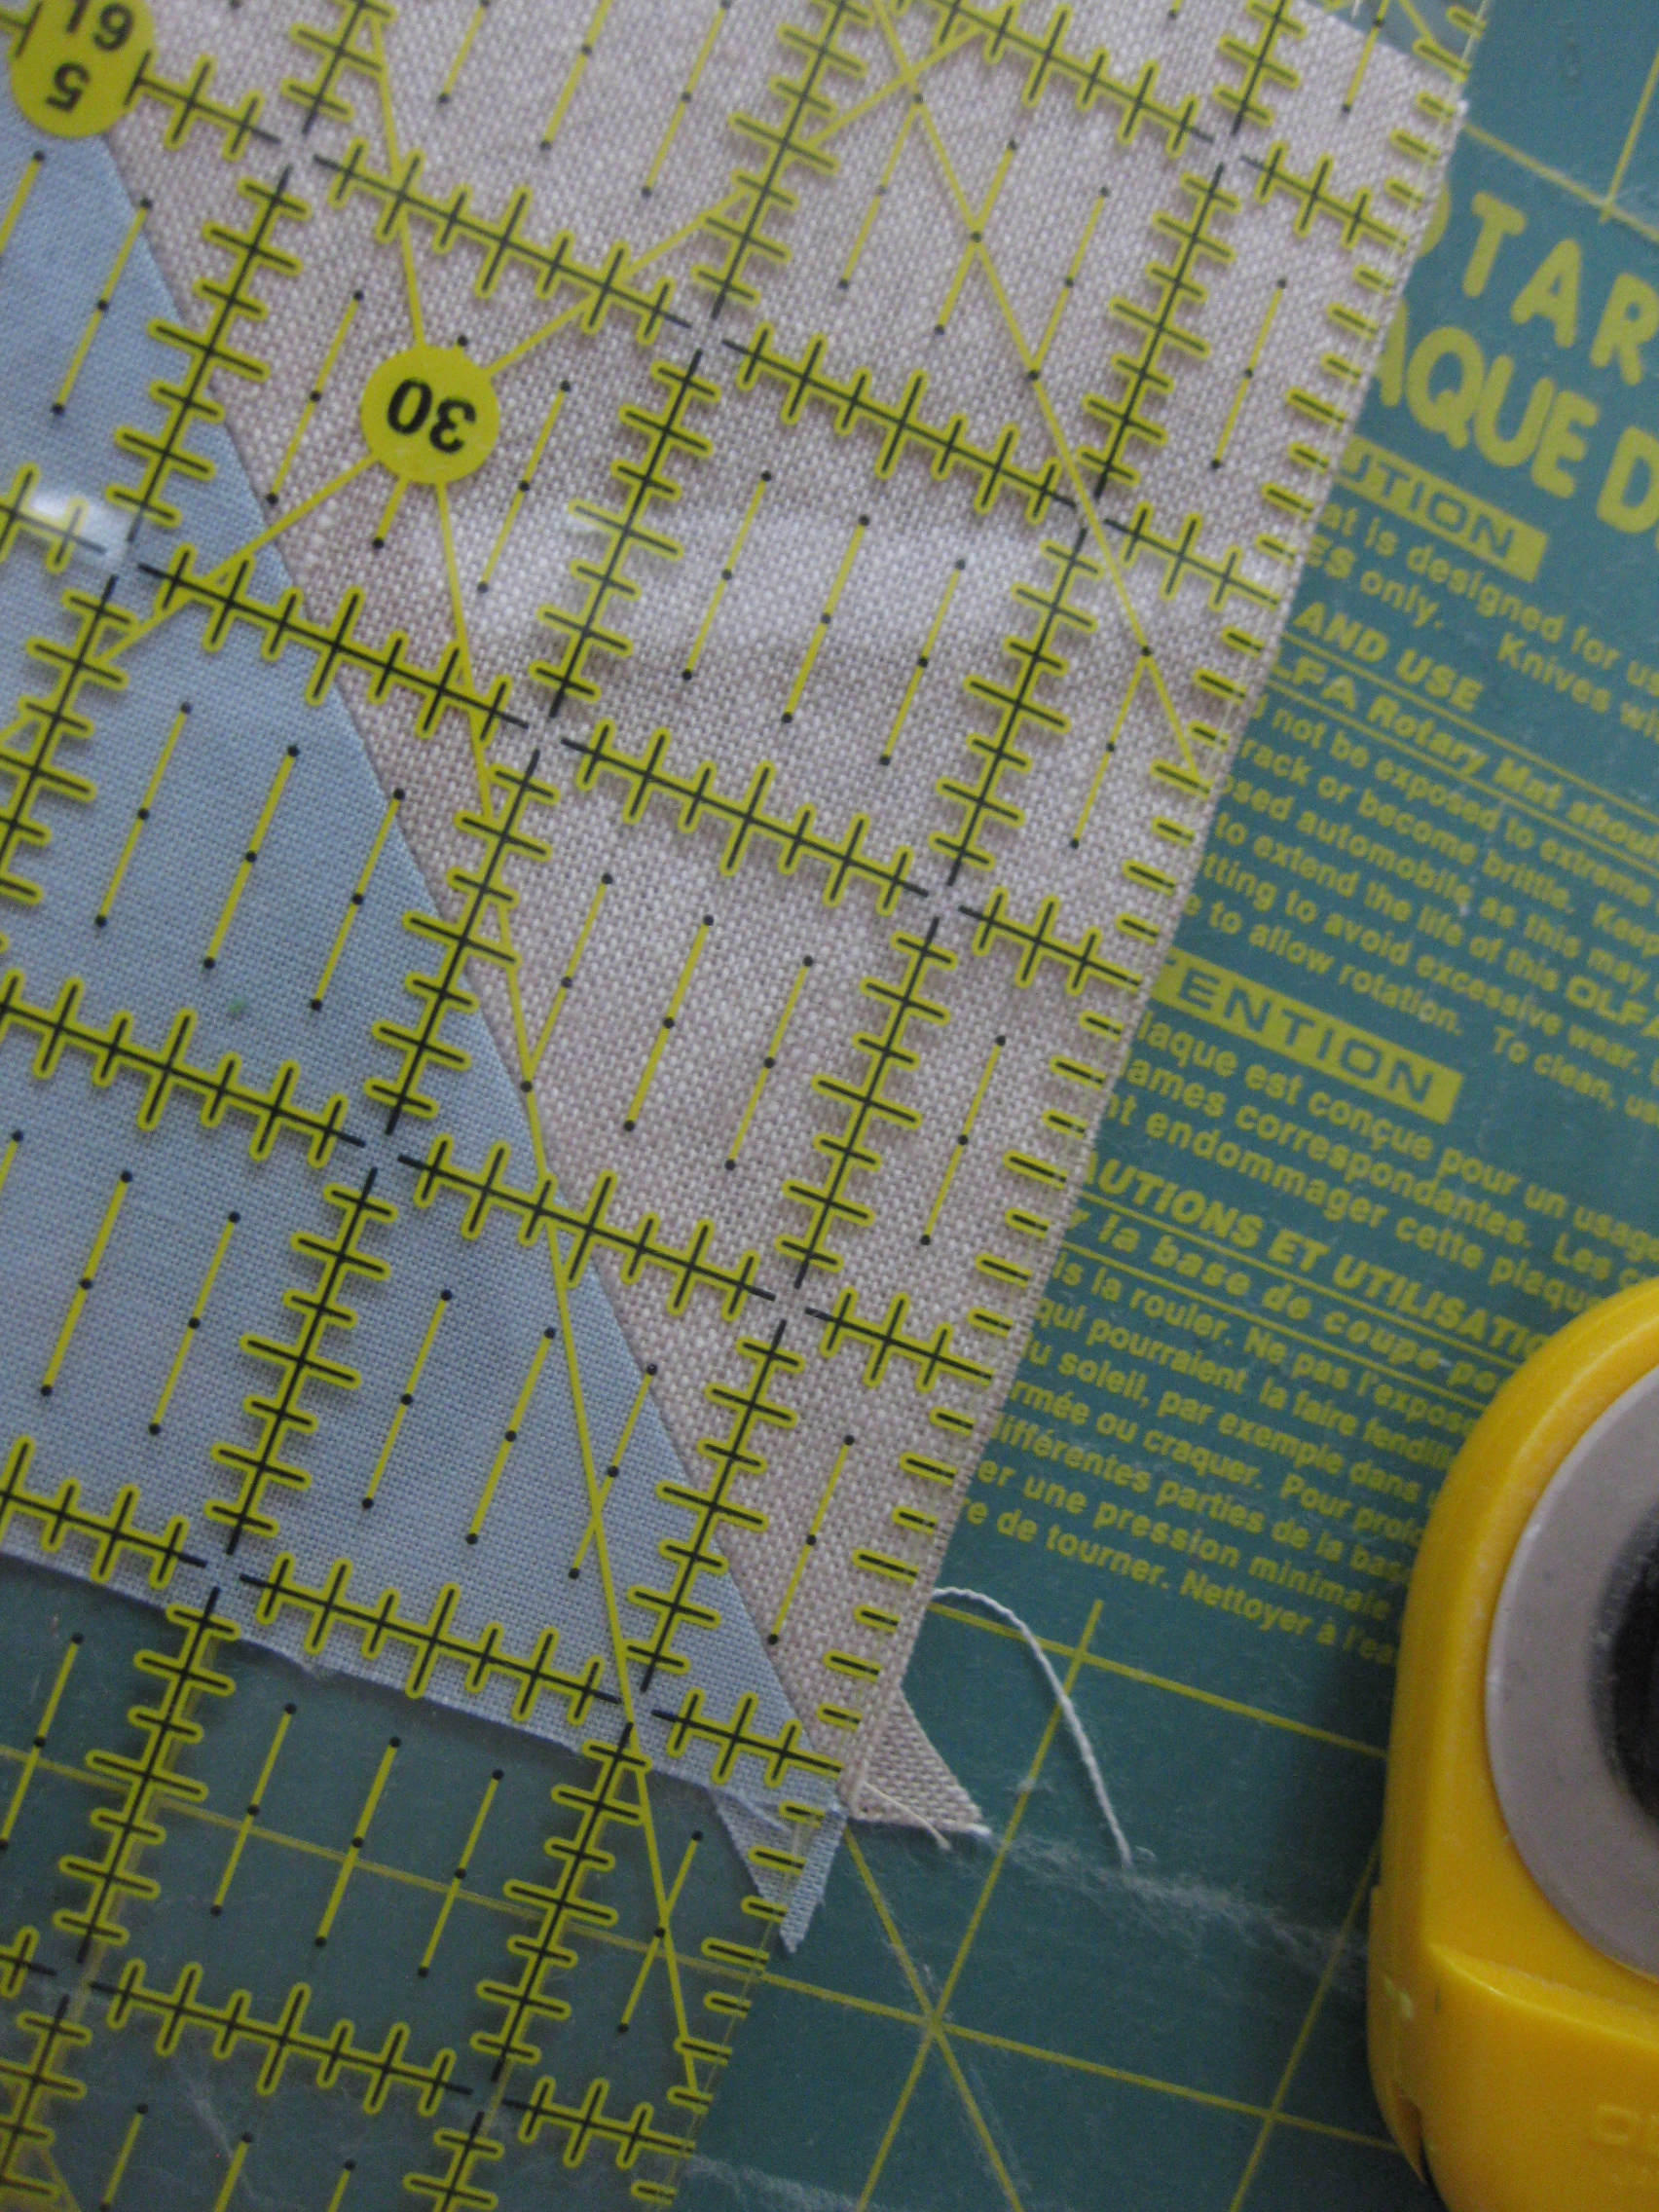
1. For the backs, cut six 4.5″ squares from the linen. For the fronts, cut three 5″ squares of linen and three 5″ squares of quilting cotton. Cut six 4.5″ squares of batting.

IMG_2815

2. Cut each of your front squares in half on the diagonal. Pin each linen triangle to a color triangle then stitch a 1/4″ seam along the diagonal. Back stitch at the start and end of each seam. Press the seams open.

3. Trim your finished fronts so they are exactly 4.5 ” squares. (If your squares are perfect, give yourself a pat on the back and just trim away those little points.) Be sure to trim so your diagonal line stays neatly centered.

IMG_2820

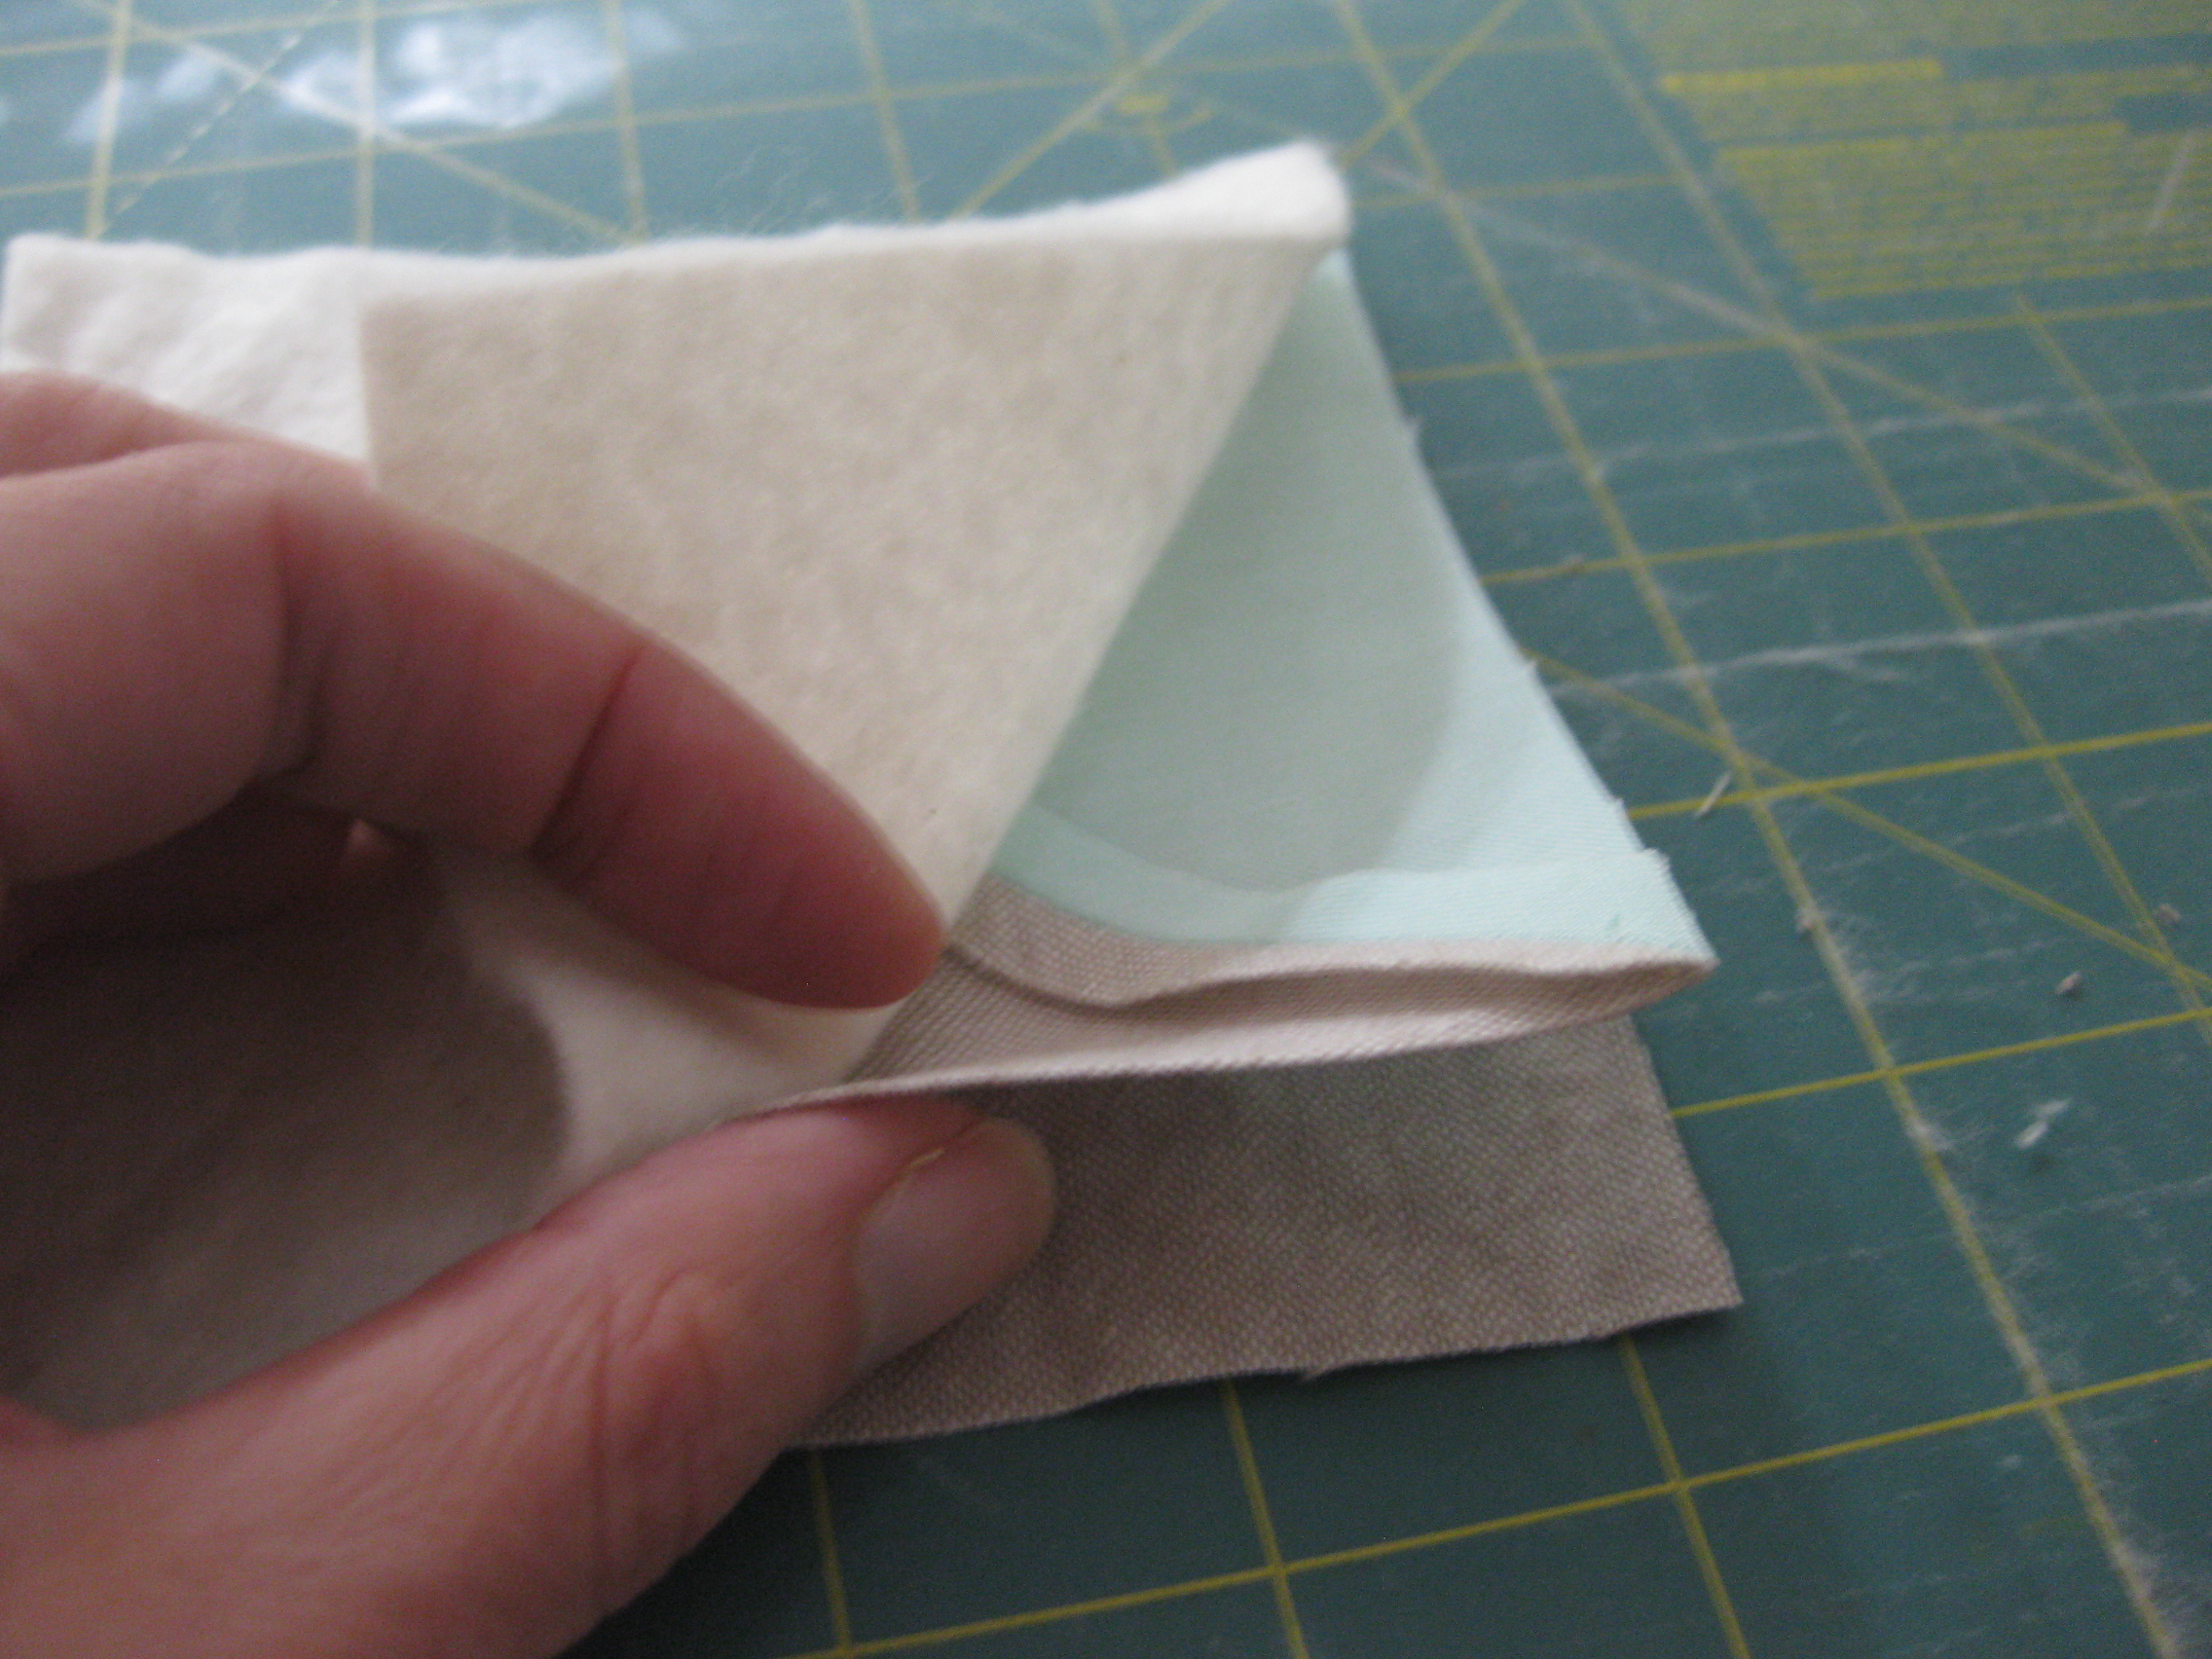
4. Make a sandwich as follows: 1) back (right side up, if your fabric has a right side), 2) front (wrong side up), 3) batting. Carefully align the squares and pin. Starting an inch away from one corner, stitch (batting side up) around the edge with a 1/4″ seam. Leave a 2″ gap on one side.

IMG_2821

5. Trim the corners and then turn your coaster right side out. When you are turning inside out, keep the front and the batting together. Poke out the corners to a neat point with a knitting needle or a chopstick. Turn under the raw edges of the gap so they align with the seamed edges and press. Pin the gap closed and then edge stitch around each triangle (back stitch in place at the start and end of each triangle).

IMG_2822

Repeat steps 4 and 5 for each coaster. Now you have a pretty set of coasters to gift or keep!


DIY: Bunny ornament

IMG_2721Just in time for Easter! This little felt bunny is perfect for your Easter trimmings or a super cute addition to an Easter basket. With minimal supplies and basic sewing skills you can make one, two, or a whole litter of these cuties. A complete pattern with bunny templates is attached to this post. Let me show you how easy these are to make!

Here is what you’ll need: wool felt, embroidery thread, stuffing, and some basic sewing tools.

IMG_2691

First, you transfer the pattern to the felt using a transfer pencil. Draw the transfer outline outside the pattern lines and then cut the bunny just inside the transfer lines. (See below that I did not do this, so my bunny has a slightly pink edge.) Also, make the lines as light as you can. I recommend testing your transfer line on a little scrap of felt. Then, cut out two bunnies and embroider the pattern on each one.

IMG_2695

After you embroider the pattern, just blanket stitch the two bunny pieces together.

IMG_2697

Leave a one-inch gap so you can add your stuffing. Then, close the gap using the same blanket stitch.

IMG_2699

And here is your cute bunny.

IMG_2706

Click the link for the complete instructions with the pattern pieces.

Bunny Ornament Pattern

(The bunny at the top of the post is an alternate version with applique ears instead of embroidery.)

Easy and Fun Valentine to Make with Kids

Arrow through the heart? Make that, Number 2 pencil through the heart! Our valentine project this year is totally old school: super simple, low cost, and homemade from stuff we have around the house.

What you need:
Pencils
Washi tape or masking tape in different colors (we used Scotch masking tape from Michael’s)
Construction paper
Scissors
X-acto

Optional: Stamps and stamp pad

Step 1: Cut out hearts from construction paper (about 5 x 5″). Let the kids do this step. Lopsided? Looking more like a liver than a heart? Remember: it’s part of the charm!

Step 2: This is a step for a grown-up. Cut two 1.5″ slits with your X-acto, one in the upper left quadrant of the heart shape, one in the bottom right quadrant.

Step 3: Decorate with stamps, stickers. Go crazy, kids! Bedazzle!

Step 4: Wrap pencils in strips of washi tape. Don’t worry, your valentines will be able to sharpen their washi-covered pencils.

Step 5: Insert pencil through your valentine heart. Now repeat 24 times–fewer, if you’re lucky enough to have lower class sizes at your school. . .

Ho Ho Ho, and all that

IMG_2465

The advent calendar was a big success! It was really fun to see the little village come together–so I thought I’d take a picture in all its elfin glory. Cheers!

IMG_2462