Creative Kid: Valentine Boxes

We didn’t reinvent the wheel this year. Or the valentine. We trotted out last year’s idea and produced in bulk. My third-grader and I used one of our six snow days here in Boston to assembly-line these valentine matchboxes. I glue-sticked and covered in red construction paper and Zeke heart-stamped. The boxes fit exactly 12 M&Ms each. We ate the extra. (I’m not sure what to do with the surplus matches.)

Happy Valentine’s Day!


Make: Post-Holiday Hurrah!

Is it over?

My favorite part of Christmas is the next day. The morning when no one is motivated to get up at 5 a.m., when instead everyone is slow and sleepy, and drowsy pleasure takes the place of excitement and package-tearing fever.

At our house a few presents remain unopened, waiting for visitors.

This year, I wrapped gifts in brown craft paper and decorated with stamping, pom poms and neon dots. One of my sons helped with stamping but mostly my kids cheered me on, always bemused by my crafty antics. (Maybe next year I’ll post before the holiday, but probably not.)

By the way, this is what has become of my project table. Portable ping pong, anyone?

Portable Ping Pong with homemadecity.com

DIY Crepe Paper Chandelier


I made this for my school library (where I’m a cardigan- & cat glasses-garbed librarian). The room has high ceilings and big windows so I’m always looking for tall, colorful projects. This one is easy and whimsical. The kids tell me that it looks like a jelly fish.

Materials:

Crepe paper streamers

String, preferably clear nylon (I only had baker’s twine on hand, so I used that!)

2 embroidery hoops–one big and one small

scissors

masking tape

Step 1: Cut lengths of crepe paper in various colors (I left my lengths super long)

Step 2: Open small embroidery hoop. Tape one end of streamer to the inside embroidery hoop.

Crepe Paper Chandelier by homemadecity.com


Step 3: Wrap the streamer around the hoop once.

Crepe Paper Chandelier by homemadecity.com


Step 4: Repeat until you’ve covered the hoop with streamers. Re-attach the outside hoop and tighten. This will secure the streamers in place.

Crepe Paper Chandelier by homemadecity.com

Step 5: Cut 4 equal lengths (about 16-18″) of fishing line/string and tie one, hanging down, to each quadrant of the small embroidery hoop. (These will attach to the large embroidery hoop.)

Step 6: Cut four lengths of fishing line/string and gather together to hang the chandelier. (At this point, there’s a lot of streamer and string and whatnot. Take a moment to hang up the whole shebang before you try to attach the large embroidery hoop.)

Step 7: Now tie the fishing line/string to each quadrant of the large embroidery hoop. I had to play around with the lengths to make sure the second hoop wasn’t too crooked.

Step 8: Finally, drape the crepe paper streamers over the large hoop.


Pinterest Round-up: Paper Chandeliers

Paper chandeliers (and some pom-pom varieties) are popping up on all my favorite Pinterest bulletin boards. They are so celebratory, so cheerful. I can imagine the paper creations draped decadently all over my apartment–or the big-windowed, high-ceilinged library where I work. The chandeliers are pajaki, literally “spiders of straw,” a holiday folk art that originated from the Lowicz region of Poland.

I found a DIY from A Beautiful Mess. The instructions call for wooden straws, which seem hard to find, but apparently Swedish straws will do–you can purchase them at Imagine Childhood.

The super-fun pom pom chandelier comes from Small for Big, which offers complete DIY instructions.

Or you can buy one! They ain’t cheap but would make a happy purchase, I’m sure. I found some on Ebay for $150 or at the Polish Art Center for $125.

DIY: How to Make Mini Paper Boxes

homemade city mini paper boxes

These 1″ little boxes won’t solve your storage problems (unless you just don’t where to put that penny, or marble, or piece of lint) but like many miniature things, they are delightful. Once during a bout of unemployment, I folded zillions of these (which may say something about my non-transferable work skills and resulting joblessness). Watch out, they’re fun. Make one, make many: they proliferate under your fingertips.

Materials

3″ square origami paper

bone folder, or a pen with a rounded cap to make creases

IMG_2853

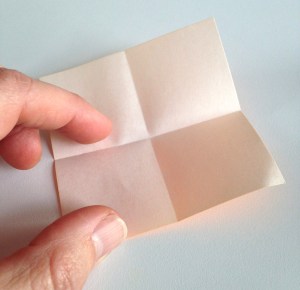
Step 1: Lay one sheet of origami paper, wrong side up, on your working surface. Fold the paper in half, long edge to long edge. (You can gently press with your fingers first, and then use your bone folder to make a sharper crease.) Open the paper and rotate 90 degrees. Fold in half again, long edge to long edge. Again, open the paper.

IMG_2869

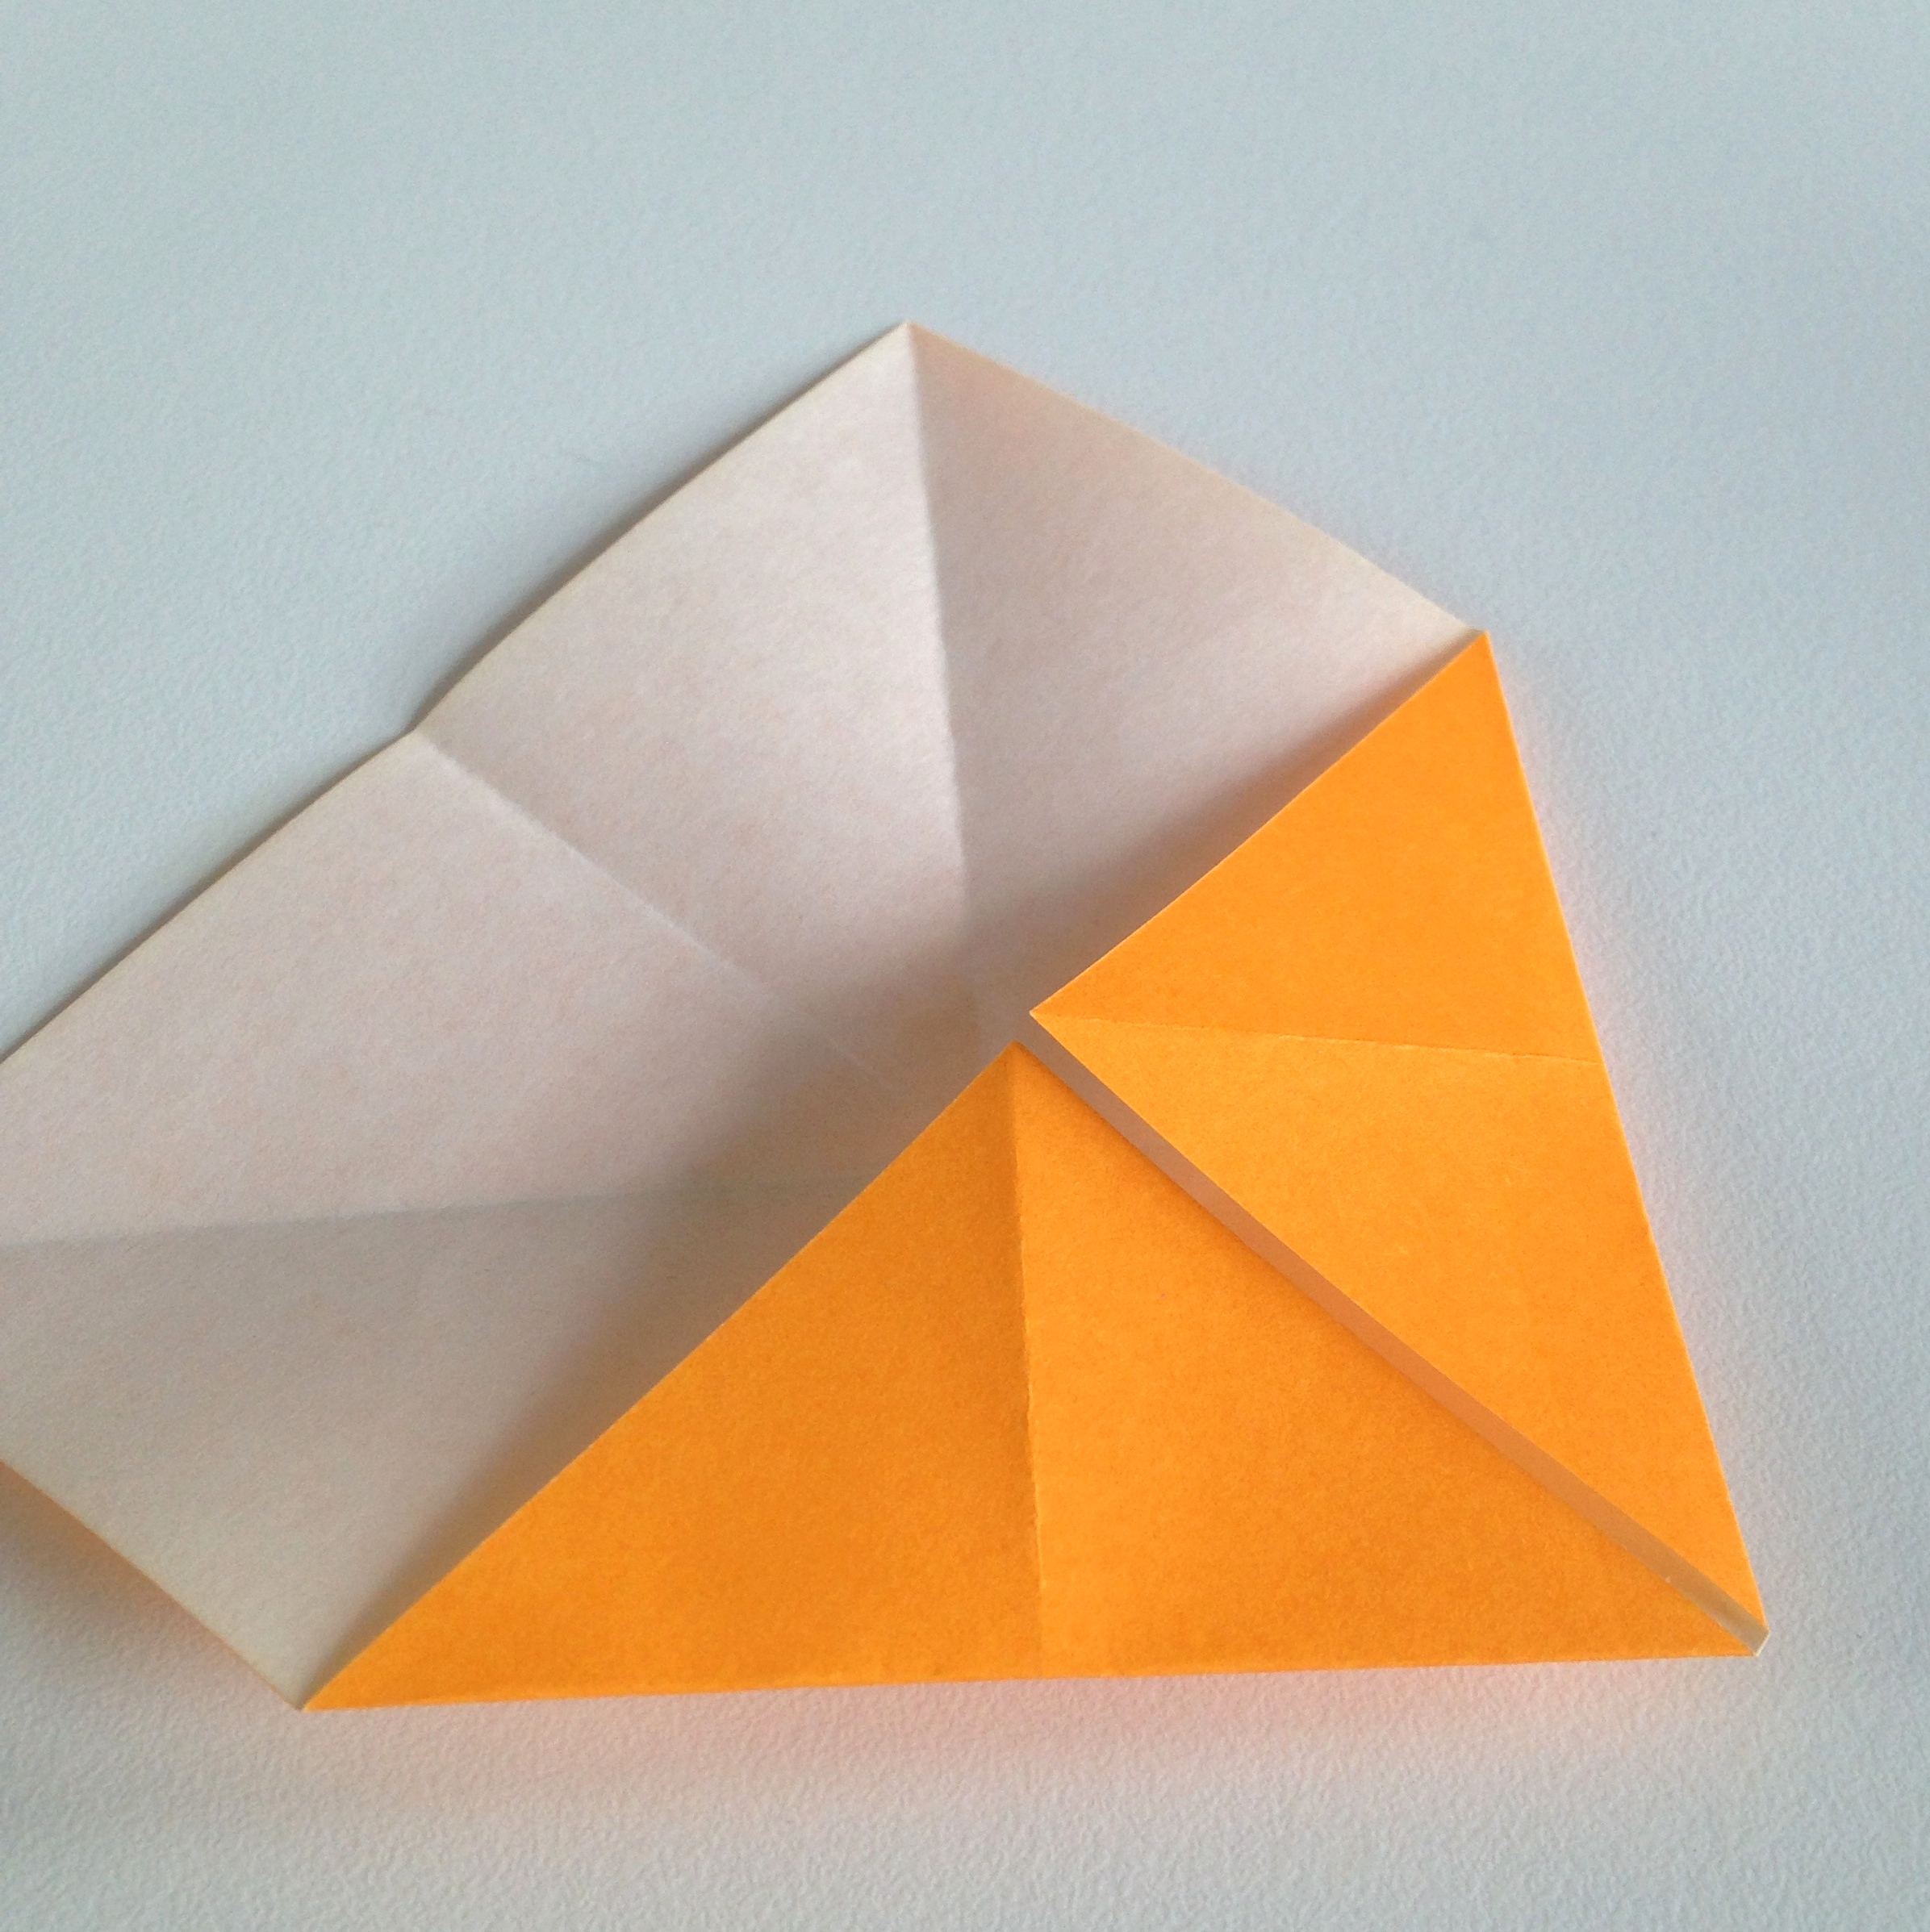
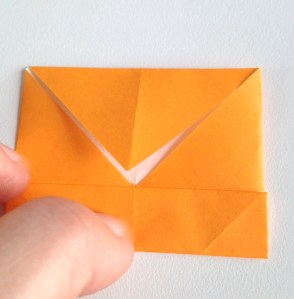
Step 2: Fold one corner to its opposite, to make a triangle. Open the paper, and fold the other corner to its opposite. Unfold. Your paper will look like this:

IMG_2873

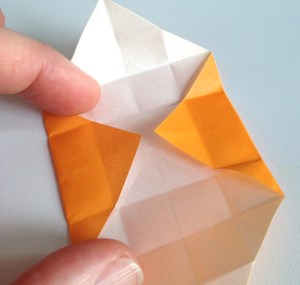
Step 3: Fold each corner to the center point. (Fold four times.)

IMG_2874

Step 4: Fold the bottom edge of your square up to the center. Fold the top edge of your square down to meet the center. Unfold. Rotate 90 degrees, and repeat, folding the remaining two edges of the square to the center.

IMG_2876

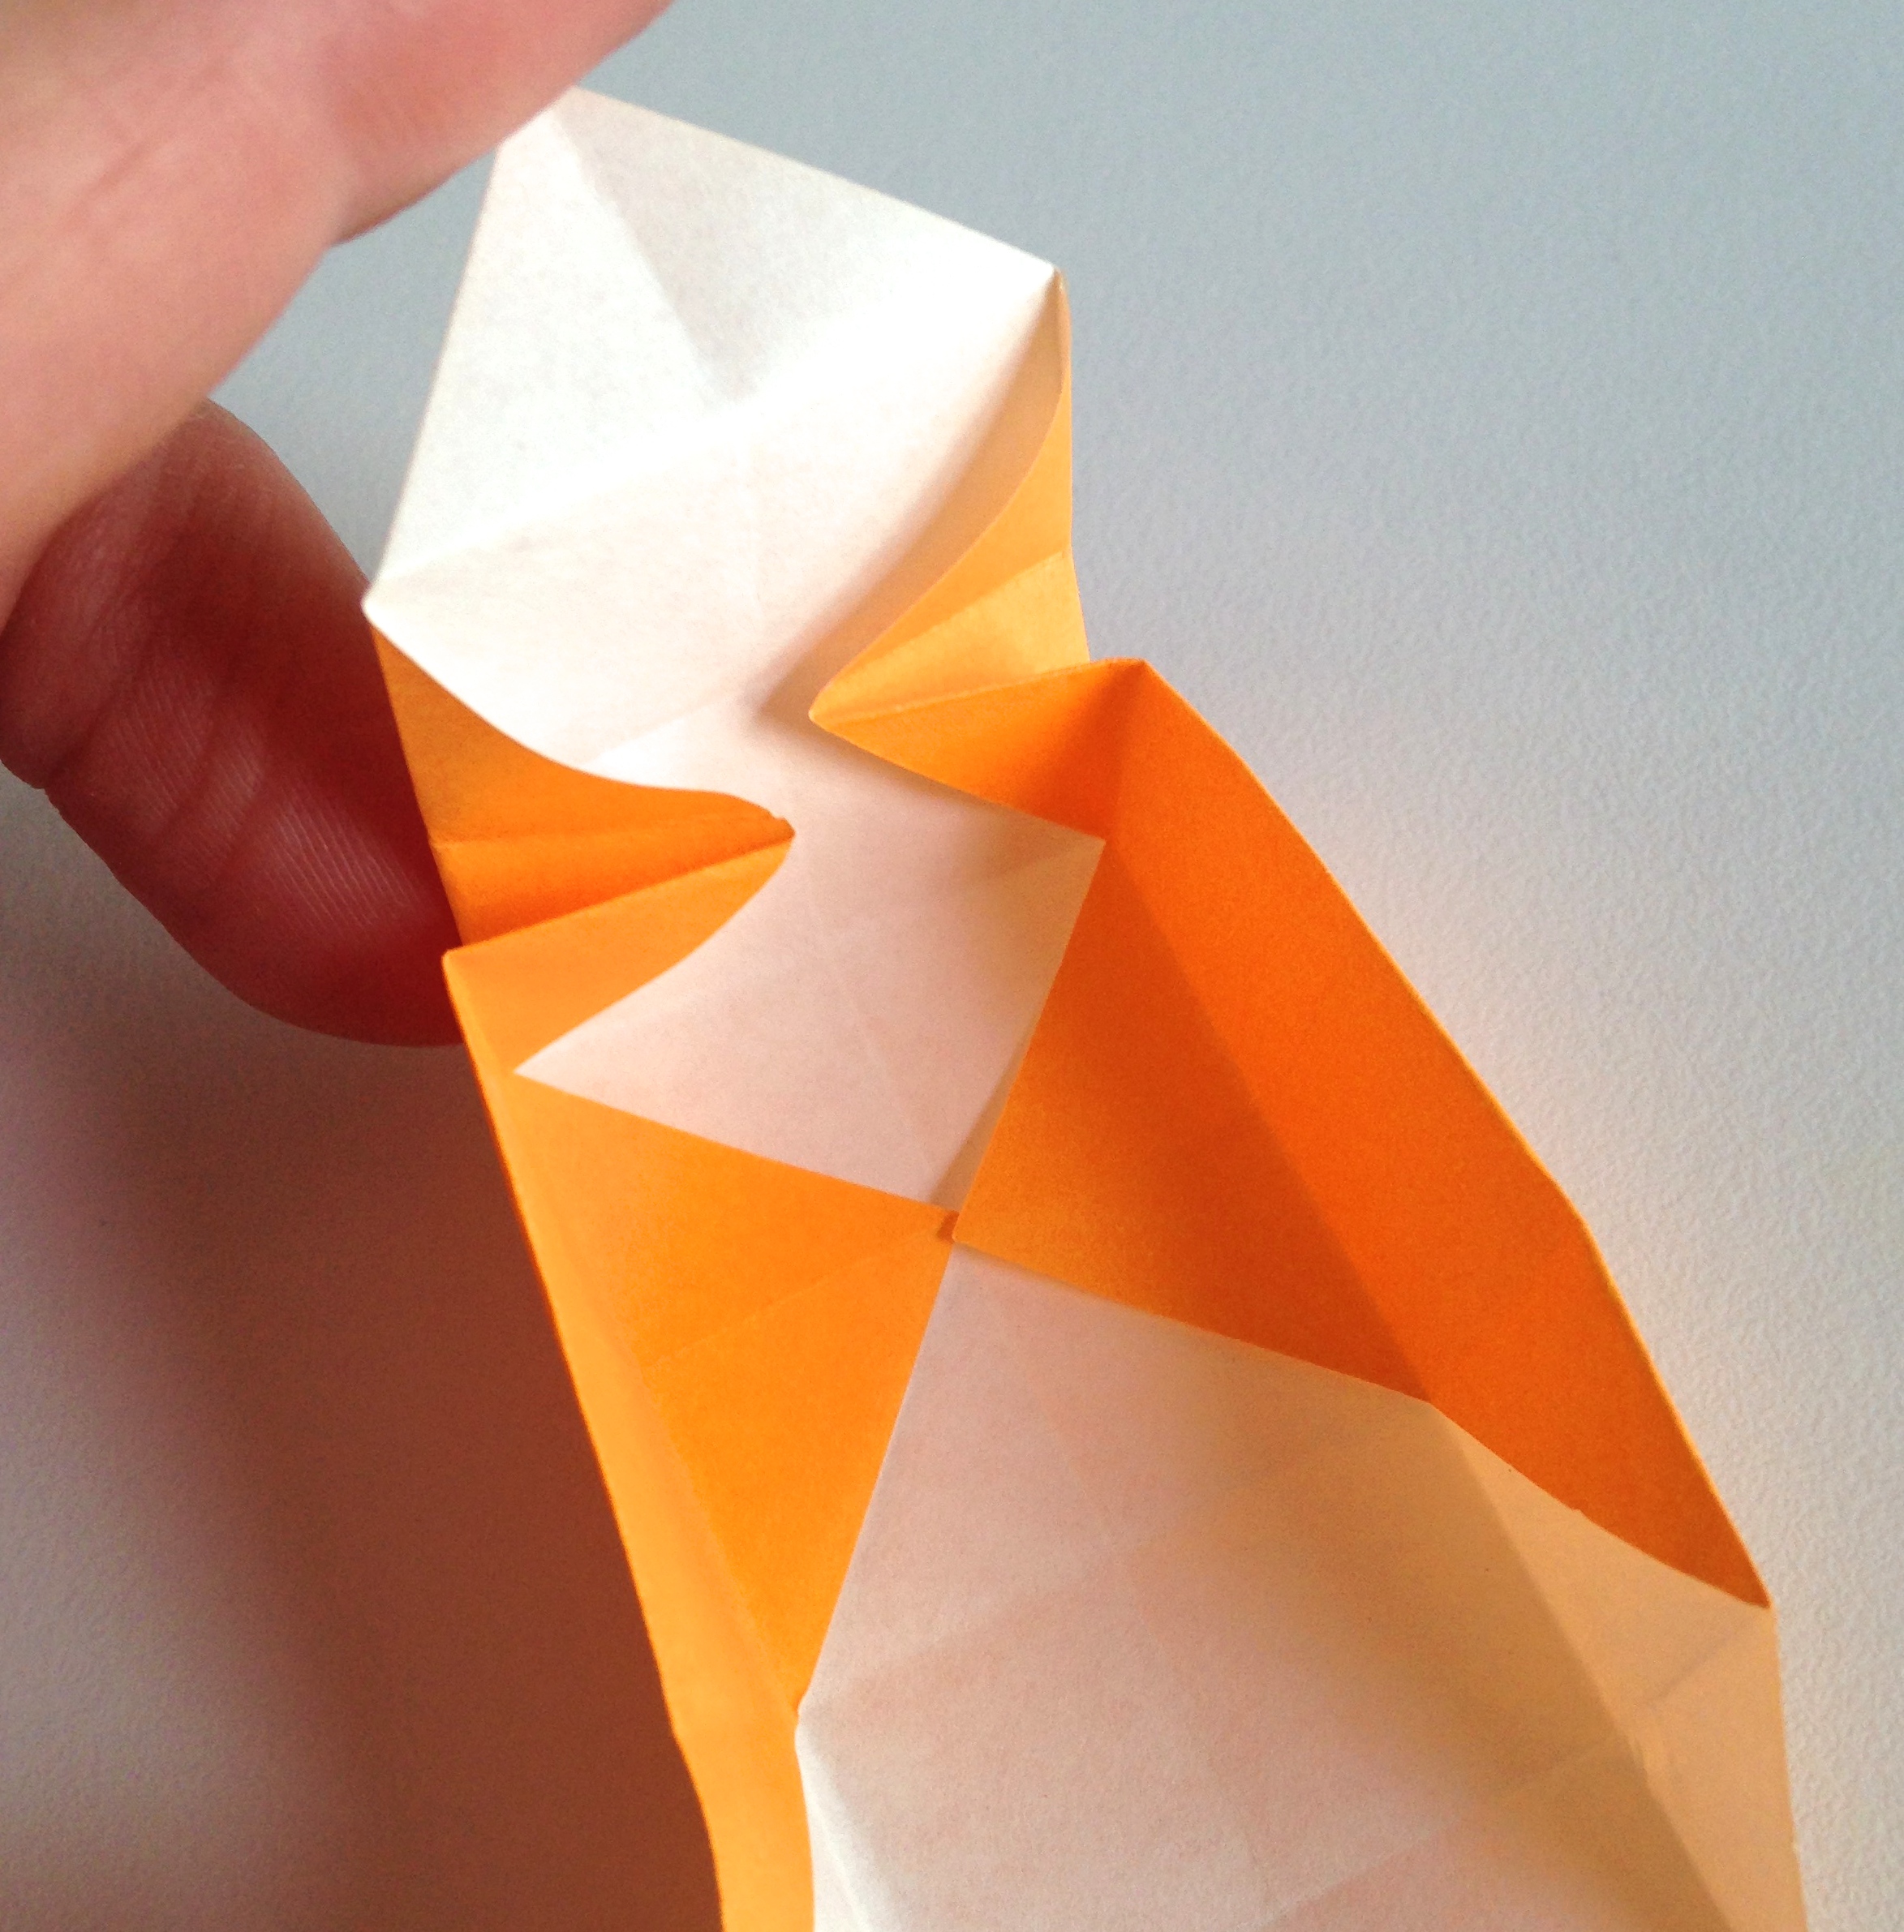
Step 5: Open two of the corners opposite each other. Lift the two sides of the box. Focussing on one corner at at time, press in the “tabs” you created with creases. As you do this, you will be lifting the third side of the box. Then press down the corner over the edge of side. The corner point should meet the other two points. Repeat to make the fourth side of the box. You’ve made the bottom half of the box.

IMG_2878IMG_2880

Step 6: To make the lid, you will do the same thing, but with one alteration. In Step 4, instead of folding the edge of the square to the center, you will instead fold it almost but not quite to the center. Leave about a millimeter of distance from the center. Do this again to the top edge. Open, and repeat with the remaining two square edges. This will make the lip of the lid shorter and increase the diameter of the lid, so that the lid fits over the bottom of the box you created.

IMG_2884IMG_2886

Enjoy!