Matchbox Chest of Drawers

We’re not pyromaniacs, really. But we do manage to go through matches at an alarming rate. And I always squirrel away the matchboxes–like clementine crates, I find them impossible to toss. So I guess that makes me a pyromaniac and a hoarder.

After I wrote about dollhouse love last month, I remembered making this matchbox chest of drawers as a kid. For those of you who share my affection for little things, this Lilliputian project is fun & quick. I used 4 matchboxes, a piece of polka-dot card stock, and those doodads (not brads–snaps?–but brads would do the trick). Here is a downloadable pdf with step-by-step instructions for making your own mini dresser.

I also admired this groovy homemade dollhouse in the April issue of Family Fun magazine (“House & Carton” by Amy Brown). This Family Fun link shows you how to make your own (from two cardboard boxes) complete with the fancy furnishings (all fashioned from egg cartons).

House & Carton

(Photo by Andrew Greto; ideas and craft stylings by Lynn Zimmerman. Reprinted with permission of Disney FamilyFun. Copyright April 2011.)

And while I’m on the topic of the miniature (I know, I know–again!) . . . I thought I’d mention the three-book series, Doll People, by Ann M. Martin and Laura Godwin, with exceptional black-and-white illustrations by Brian Selznick (including a cut-away of an antique dollhouse).

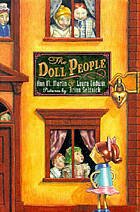
Yes, the doll people are alive & there’s a creepy baby doll in one of the stories–but the books are gentle and true to a kid’s perspective. They are emphatically not Toy Story. Toy Story 3, with its hints of torture and apocalypse, left my 5-year-old weeping in the theater aisle. And me, too, for that matter. But Zeke & I just finished these books & we loved them.

Freezer Paper Stencils: VW Bus Pillowcases

Punch buggy. (Or in this case, Punch bus.) Spring is here & so is the VW bus parked outside my house. (The sign in the window says: Hippies Use Backdoor.)

So in honor of the reappearance of spring and VW buses, I decided to give some old white pillowcases new life. Plus I wanted to make something for my 11-year-old who is easily embarrassed by T-shirts proclaiming anything, let alone T-shirts homemade by his mother, so I figured pillowcases were a safe zone, free from 5th grade peer review.

I cut a stencil on freezer paper from an image of a VW bus that I downloaded online. As I’ve mentioned before, freezer paper stencils are wicked easy & satisfying. Here is the complete how-to. To trim the pillowcases, I bought a half a yard of Happy Camper fabric from the Monaluna Circa 60 Beach Mod line for Birch Fabrics (available at Fabricworm). I should’ve bought a yard, but I was too cheap ($8.25 for half a yard!). It’s organic, alas.

 (The print is darker than how it appears on Fabricworm.)

No room for error. The pressure was on! I sewed the fabric directly onto the existing pillow trim (I split the seam for the trim–but not the rest of the pillowcase–to make it easier to sew). For the edge that you see on the outside of the pillowcase, I folded 1/4″ of the fabric, ironed, and sewed as close to the edge as I could. For the hem inside of the pillowcase, I folded 1/4″ over twice to completely encase the raw edge. Not sure if this is the best way to add trim, but it looks decent and adds a pleasing weight to the end of the pillow.

DIY Cookbook

I’m an ambivalent cook, and not a very intuitive one. So when I come across a good recipe, I hold onto it for dear life. Over the years, I’ve collected a hodgepodge of scribbled sticky notes and magazine tear sheets with favorite recipes.

The mess needed a home. So, I ordered a Rebinder (which is a binder made from recycled corrugated cardboard) and a box of sheet protectors for my recipes. The Rebinder was terrific, but not so great at repelling cooking drips & spills.

I bought a yard of green gingham oil cloth, and relying on my ancient memories of covering books in high school, I winged it. Here are my step-by-step instructions for making an oilcloth cover, written after the fact. I’m pleased with the results. I sewed the last steps while the cover was actually on the binder–it’s sewed on forever–which might be why it doesn’t buckle & lies nice and flat.

Sock Dog

We’re just back from a long weekend in the Deep North at my brother’s house–skiing, ice skating, and, in my case, suffering from a stomach bug. What is more pleasant than a puking houseguest? you might ask. I’m pretty sure Ben Franklin coined a pithy adage about it.

Not only was my beautiful sister-in-law, Toni, gracious about my digestive turmoil, but she also let me photograph her latest sewing projects.  

She made this polka dot pooch from a couple of old socks. Such a cute pup! The pattern comes from Martha Stewart Crafts (step-by-step instructions here). You can also find it in Martha Stewart’s Encyclopedia of Sewing and Fabric Crafts.

Toni also made this pretty drawstring  bag from a pattern in Heather Ross’s Weekend Sewing.


And this canvas bag (perfect size for an IPad or say, those paper things formerly known as books) from Simple Sewing by Lotta Jansdotter.

Thank you ever so much, T. I promise not to return for a while. Love, m.

Heart Crayons

I’m squeezing in one last post before Monday for those of you who

1.) enjoy the smell of melting wax emanating from your toaster oven.

2.) own crayons so ancient they are growing a fur of mold.

3.) like to celebrate Valentine’s Day by smashing things with a hammer.

You will need crayons (pink, red, white, purple), the aforementioned hammer and toaster oven, a heart-shaped candy mold, and fingernails long enough to tear at the crayons’ very resistant paper wrappers. I used a silicone heart mold from Ikea, meant for making ice cubes. Not a good idea, but it worked. I have definitely destoyed the mold from ever being used again for its original purpose.

I smashed the crayons to smithereens (inside a paper bag), divided the colored bits into the molds, and placed the tray in the oven at 250F.  Watch out: the crayon wax melts quickly (in less than a minute), and if you wait too long, the colors blend together and look like purple soup.

 Cooling on the counter (note those uneaten clementines).

 Voila.

postscript:

The mailman brought this little package . . .

and inside were pink & gray striped mittens!

My five-year-old cracked up when I tried them on and my fingers poked through.

Thank you, Brig! They are absolutely beautiful.