
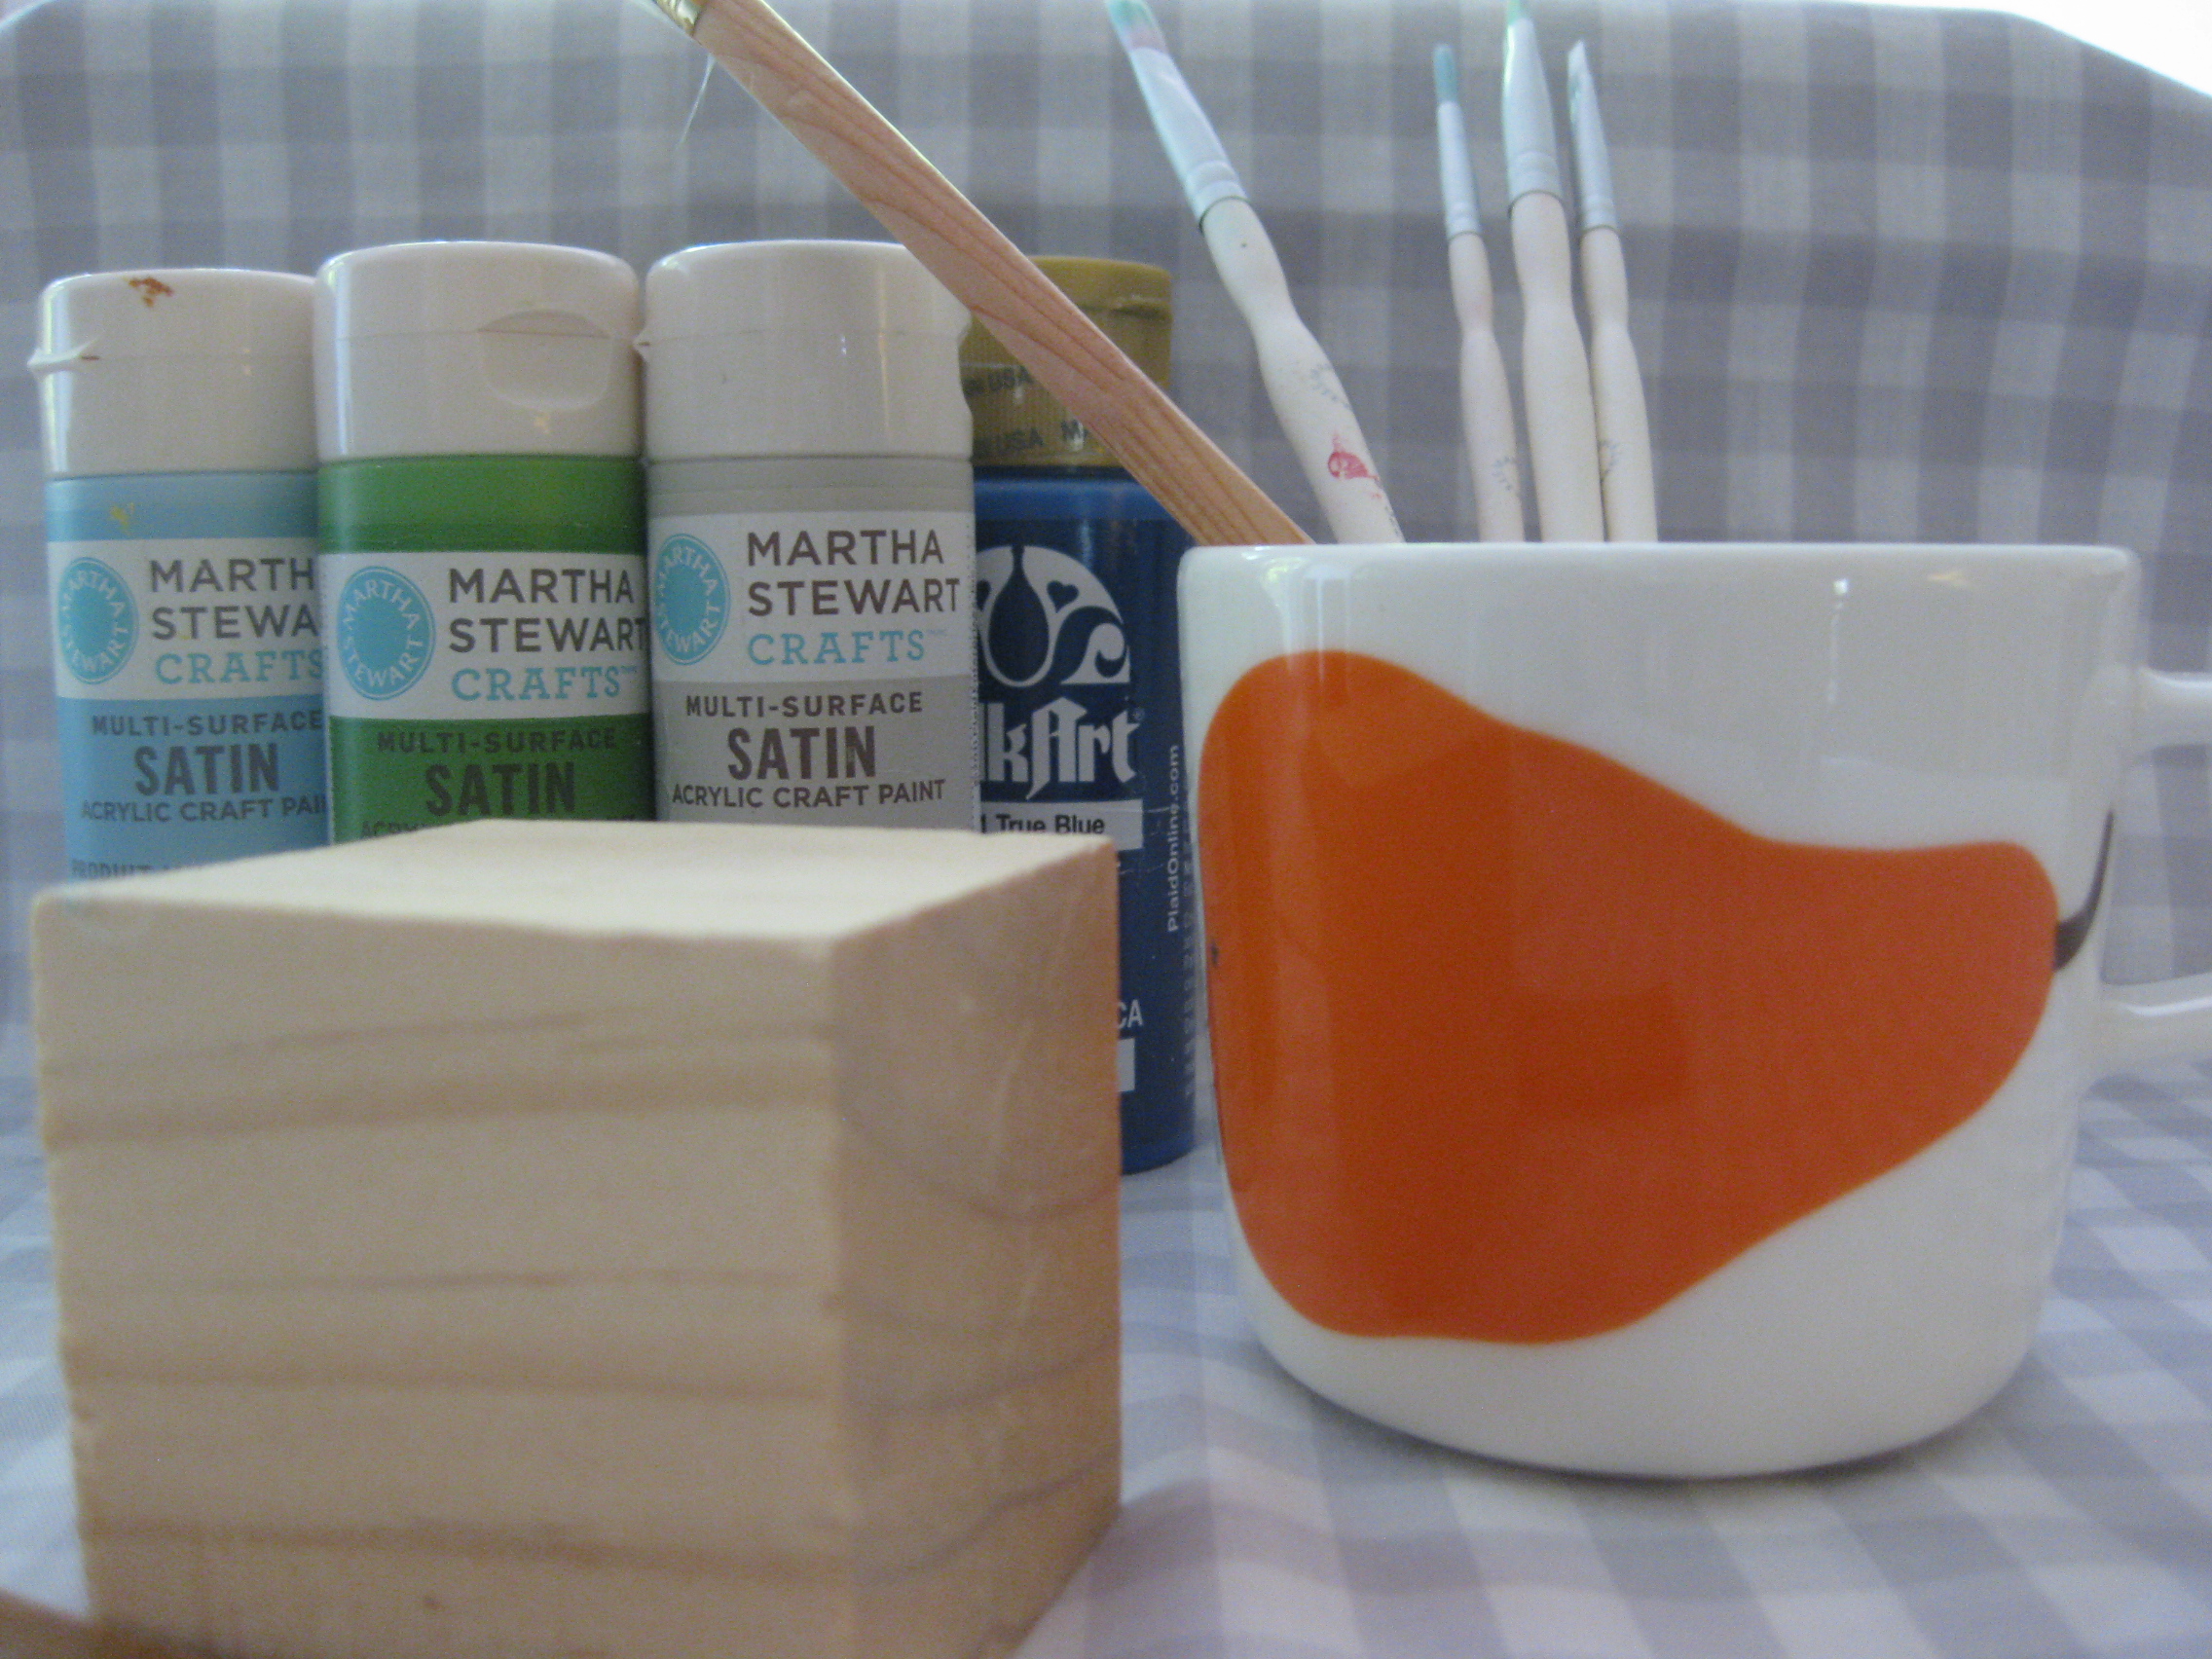
Maybe you are like me–I love traditional quilt blocks but I find an entire quilt of neat geometric blocks just a little too quilty. Well, I found the perfect way to enjoy the pleasing geometry of quilt blocks without committing to an expanse of pinwheels and flying geese. Wooden blocks turn out to be ideally suited to painted quilt blocks. A two-inch wooden cube, a pencil, a ruler, and some craft paint are all you need to satisfy your quilty enthusiasm in a brief hour or so.
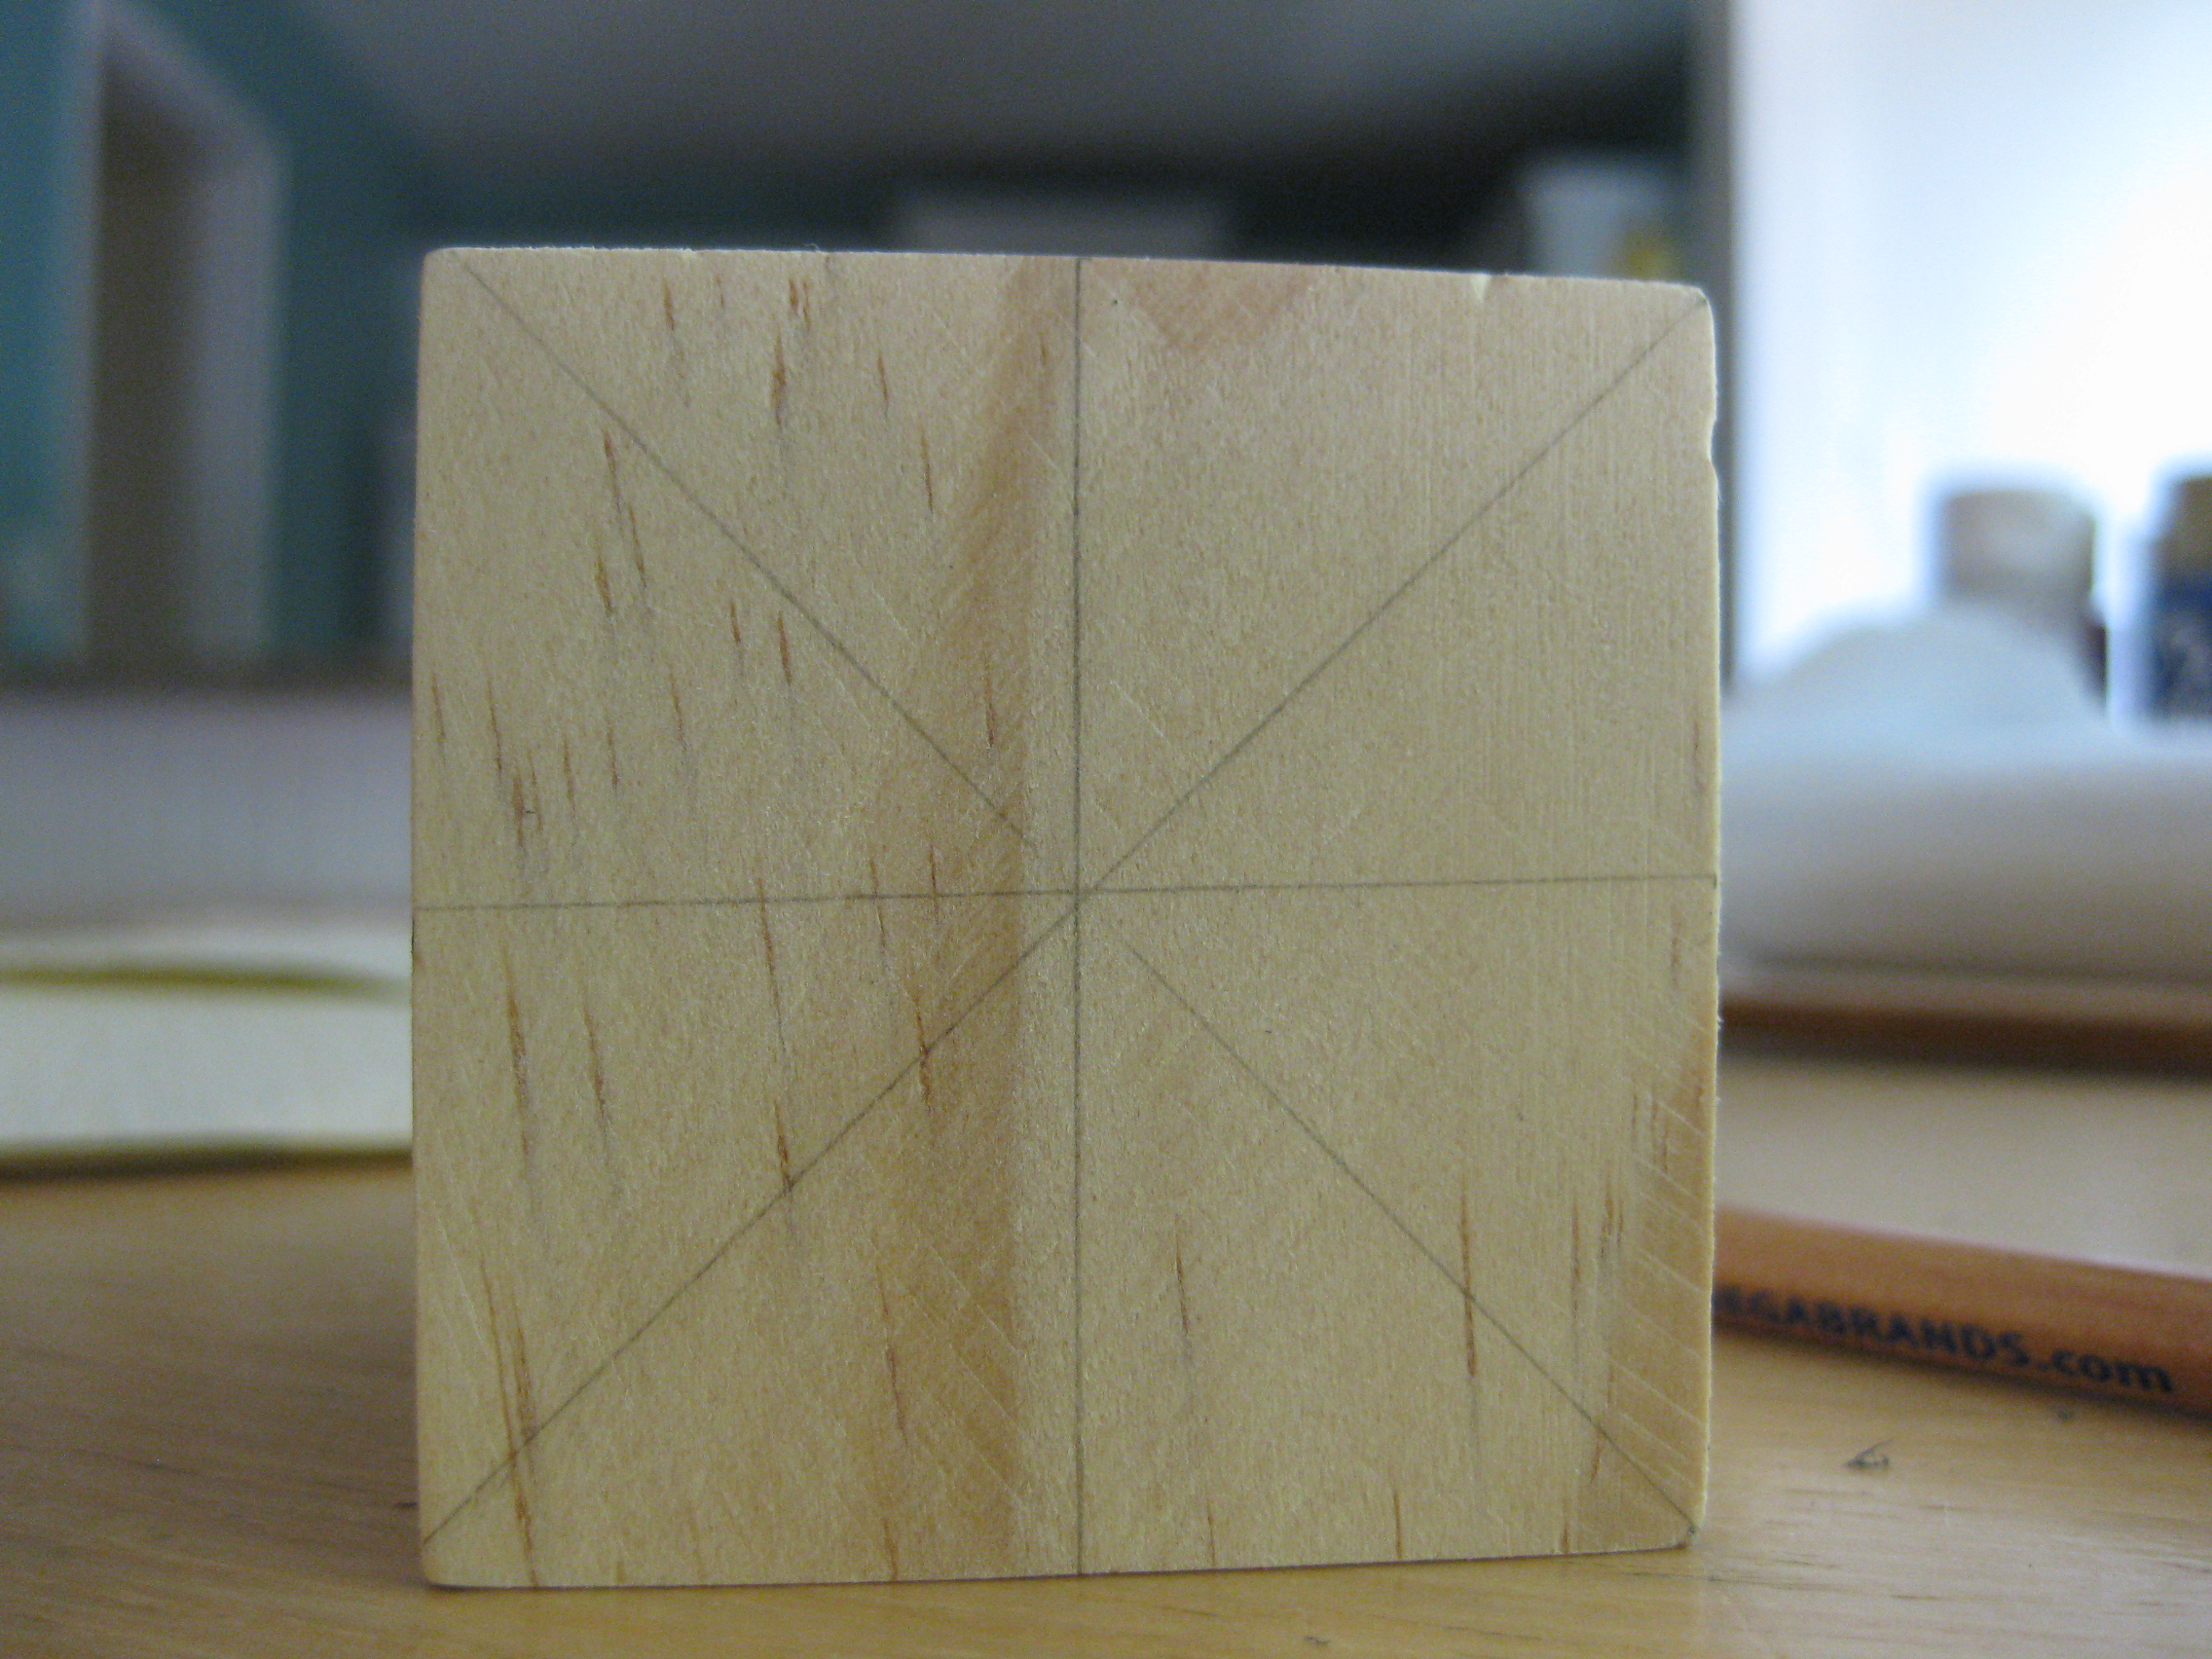
First, I marked the lines of my pattern using a ruler and a regular pencil.
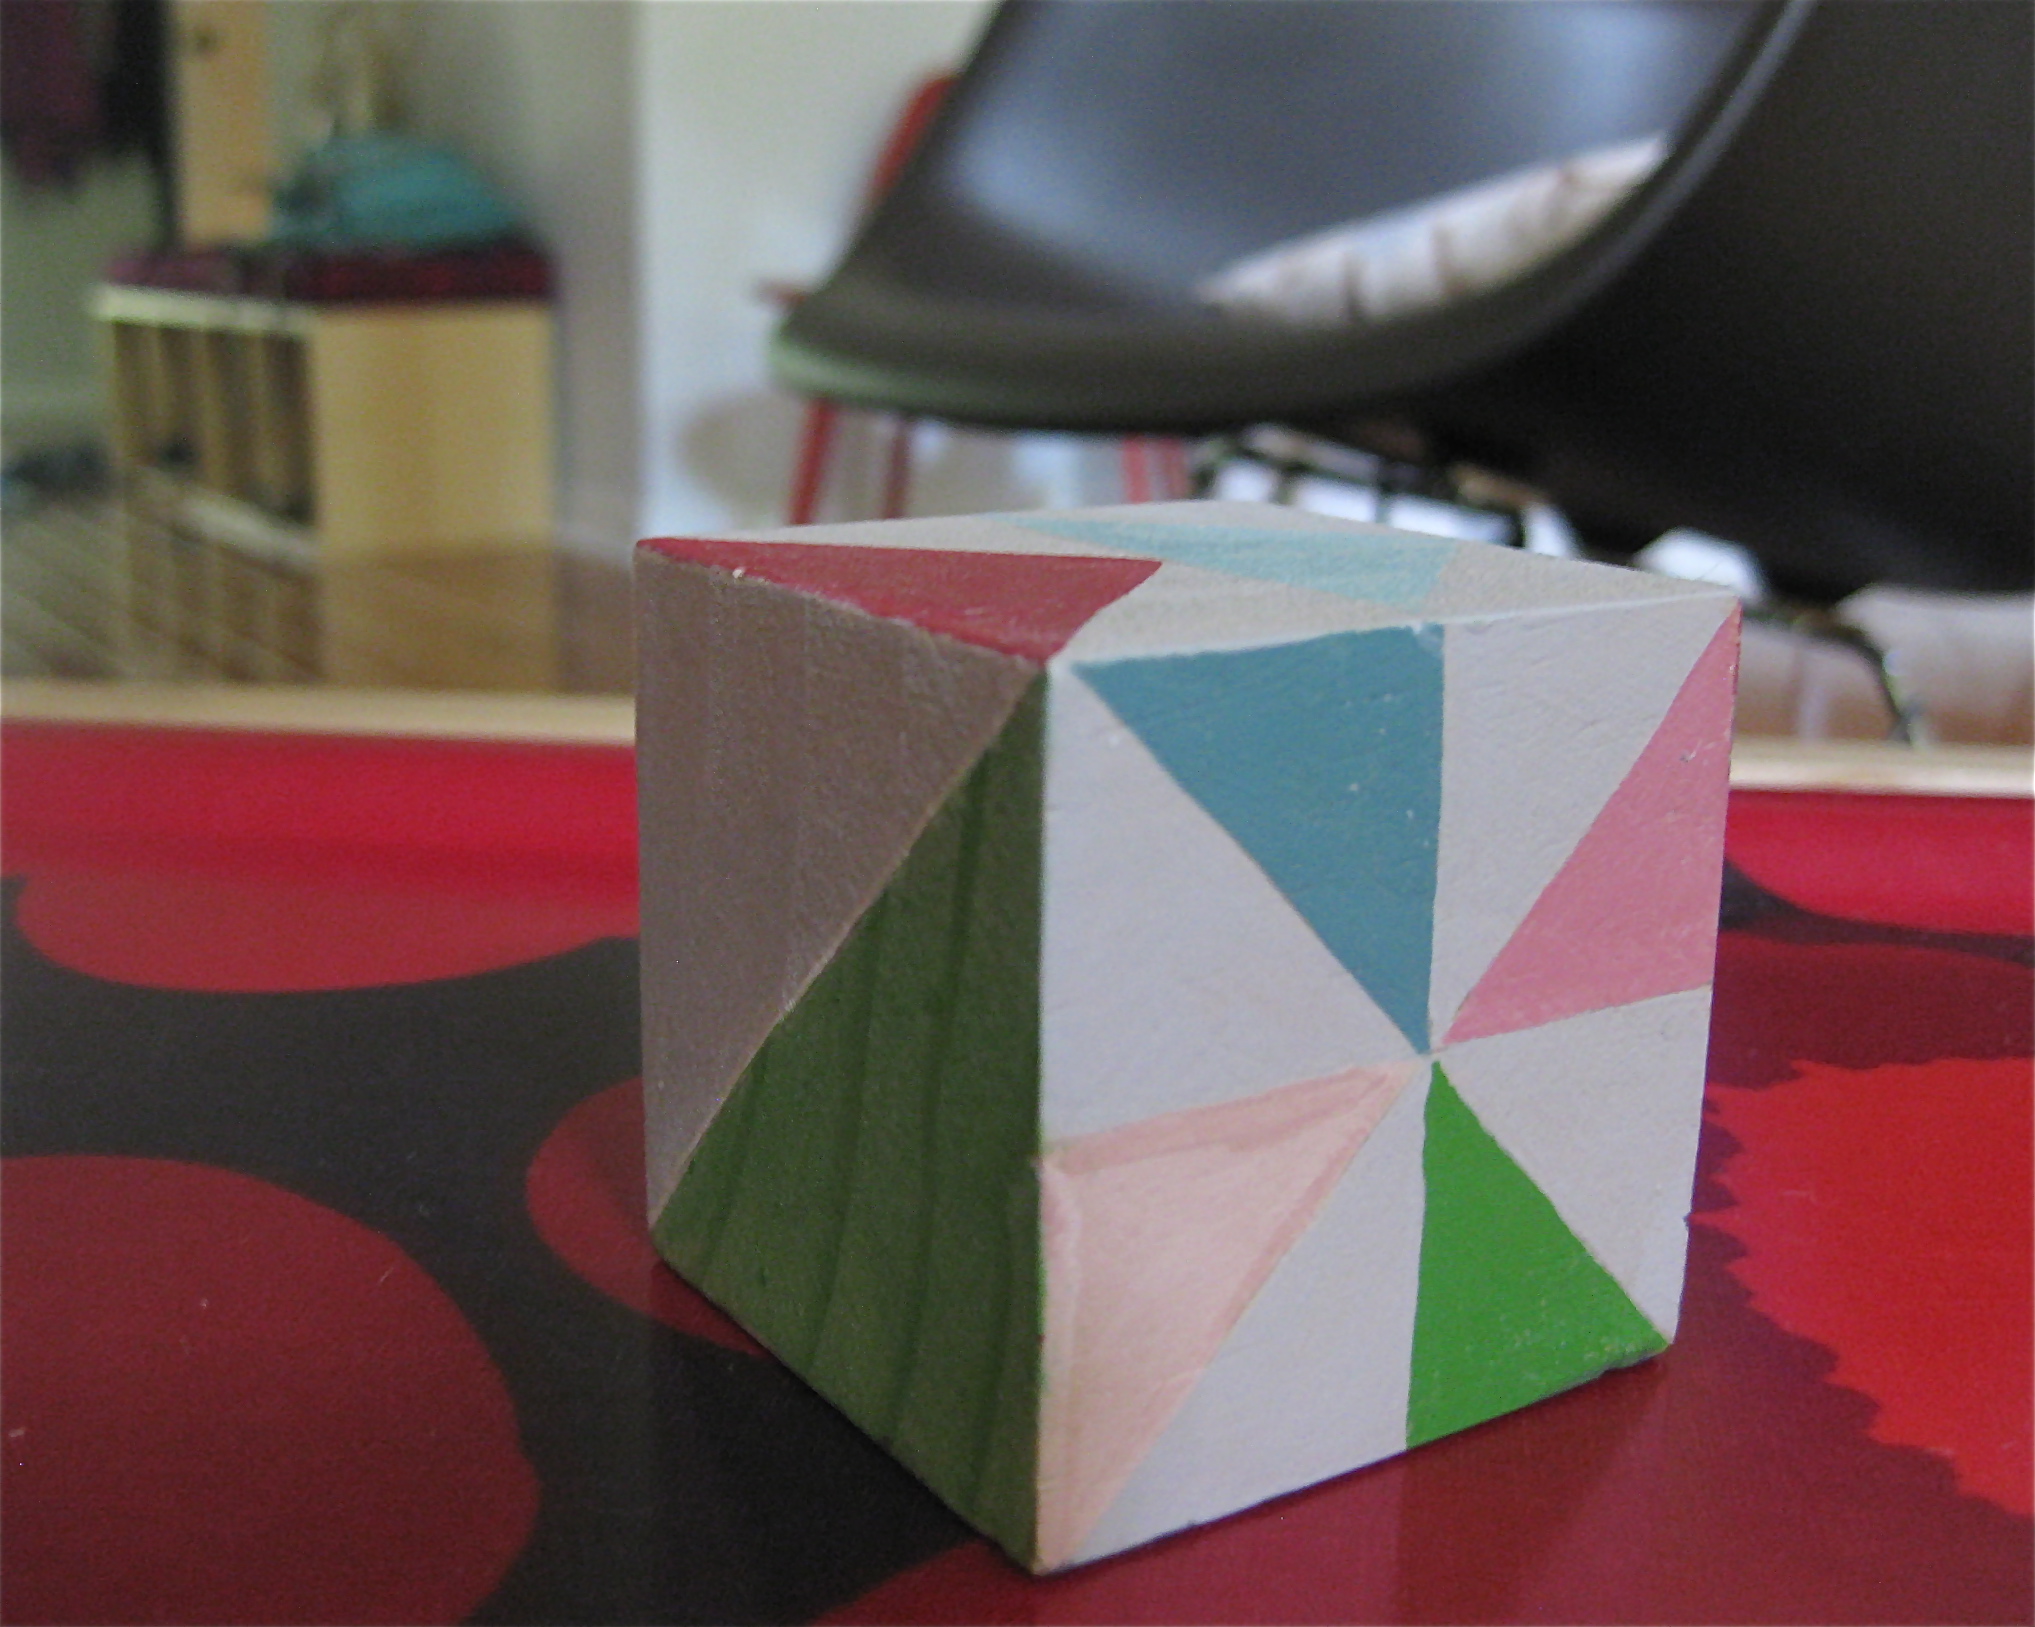
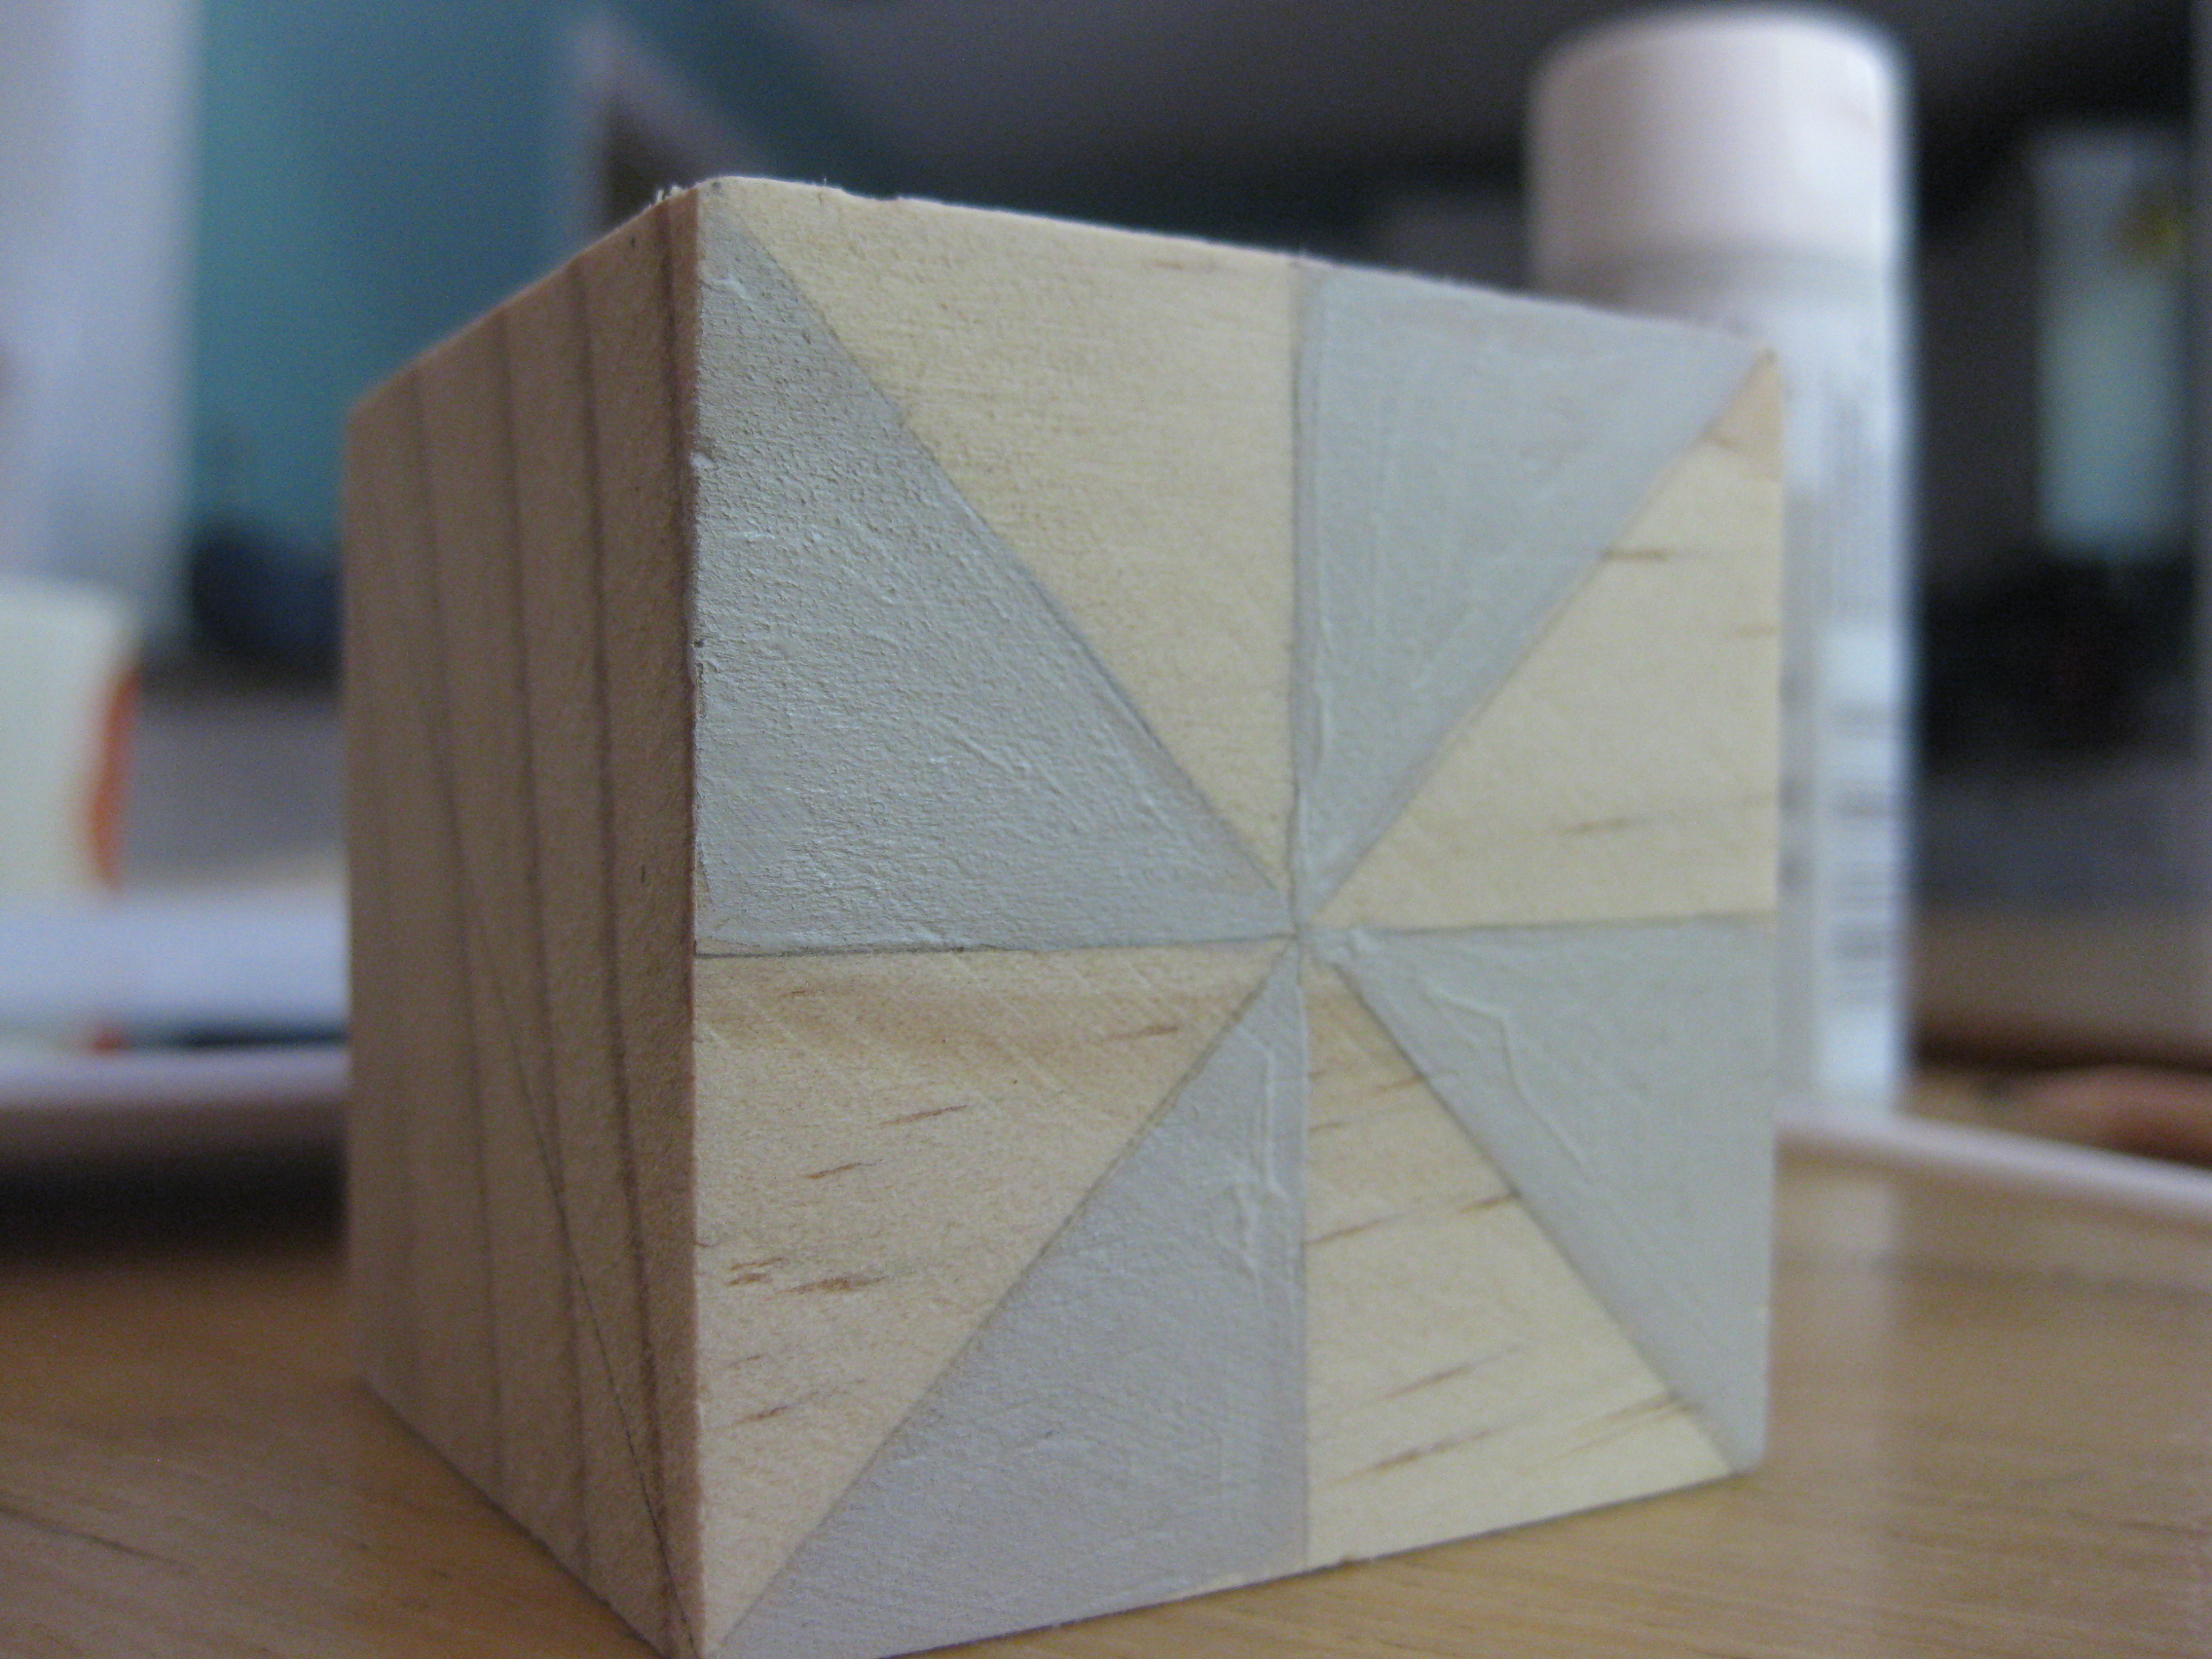
Then I painted the pattern starting with the main color.
Then I added the secondary colors. When the paint dried, I used a wax finishing paste to protect the painted surface. I think I applied it a little too liberally. But, I have plans to make a few more blocks so I can perfect my technique. For my next block I going to paint the same pattern on all sides. I am thinking of a navy and cream flying geese block block. Can’t wait!

Love. Painting quilts can be just as rewarding as quilting quilts! I’ve never used wax finishing paste . . . it’s not a leg hair removal system, right? I like how your photo reveals a little of your house, too. I’m still waiting for your house tour!
Maybe it could double as hair removal–tutorial anyone?? It’s a min wax product and I probably have the name wrong. I like it much better than varnish, which in Florida seems to stay tacky. You just rub the paste on with a cloth and then buff when it’s dry. It leaves a nice matte finish and it has a lovely mineral oil sort of smell.
Very intriguing! I will check and see if they have it at my local craft place.
I got it at Home Depot when I was supposed to be buying caulk for the tub.
Pingback: Quilt block blocks–part 2 |